
Using a lacrosse ball to loosen hips is a highly effective, accessible, and affordable self-massage technique that targets deep muscle tension, improves mobility, and alleviates pain. Hip tightness is common due to prolonged sitting, athletic strain, or poor posture, and it can contribute to lower back pain, restricted movement, and overall discomfort. Here is a comprehensive guide on how to use a lacrosse ball to release hip tightness, including detailed techniques, benefits, timing, and expert tips.
Why Use a Lacrosse Ball for Hip Tightness?
Lacrosse balls are dense and firm, allowing them to apply precise pressure to deep muscle tissues and trigger points-areas of tension that limit blood flow and mobility. Unlike foam rollers, lacrosse balls can reach smaller, harder-to-access muscles around the hip joint, making them ideal for targeted release.
Key benefits include:
-
Improved hip mobility and range of motion
-
Relief from muscle tightness and tension
-
Reduced lower back and gluteal pain
-
Enhanced circulation and faster recovery
-
Prevention of injury through better muscle function
Infographic: Loosen Tight Hips with a Lacrosse Ball – 3 Simple Steps

Understanding Hip Tightness: Which Muscles Are You Releasing?
When people say their hips are tight, several muscles and soft tissues are often involved:
-
Gluteus medius and maximus: Large muscles in the buttocks
-
Piriformis: Deep gluteal muscle linked to sciatic nerve tension
-
Tensor fasciae latae (TFL): Outer front hip muscle
-
Iliopsoas: Deep hip flexor muscle
-
Adductors: Inner thigh muscles
Each of these can be effectively targeted with a lacrosse ball to release tension and improve function.
When to Use a Lacrosse Ball for Hip Release
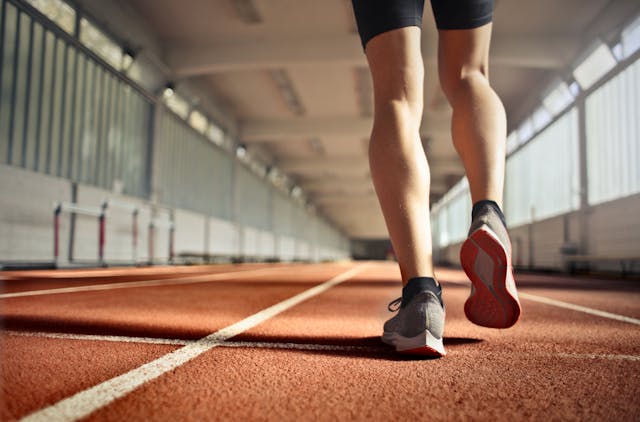
Using a lacrosse ball for hip release can be a highly effective addition to your mobility and recovery routine, especially when timed correctly. Ideally, you can incorporate it before workouts to help increase mobility in the hips and surrounding muscles. This pre-workout release allows for better range of motion during exercises like squats, lunges, or even walking and running, reducing the risk of strain or injury. After workouts, the lacrosse ball becomes a tool for recovery—helping to alleviate muscle soreness, break up adhesions, and promote faster healing. It’s also incredibly beneficial on recovery or rest days, offering a low-impact way to continue working on flexibility and circulation without overtaxing your body. Many people also find relief using the ball after long periods of sitting or driving, when the hips tend to stiffen or tighten due to inactivity and compression. Whether at your desk or after a road trip, this can be a simple, quick intervention to bring ease back to your movement. Aim to spend 1–2 minutes on each tight area, applying gentle pressure and breathing deeply to trigger the parasympathetic nervous system and encourage the muscles to relax more fully.
Warm Up Before You Release
Jumping straight into deep tissue work without warming up can sometimes make muscles resist instead of relax. To get the most out of your lacrosse ball routine, consider doing a few minutes of light movement beforehand. Things like walking, gentle leg swings, or dynamic stretches such as cat-cow or hip circles can help increase blood flow to the muscles and prepare your body for release work. This makes the tissue more pliable and responsive—and honestly, it just feels better.
Step-by-Step Lacrosse Ball Hip Release Techniques
You will need a lacrosse ball and a yoga mat or soft surface.
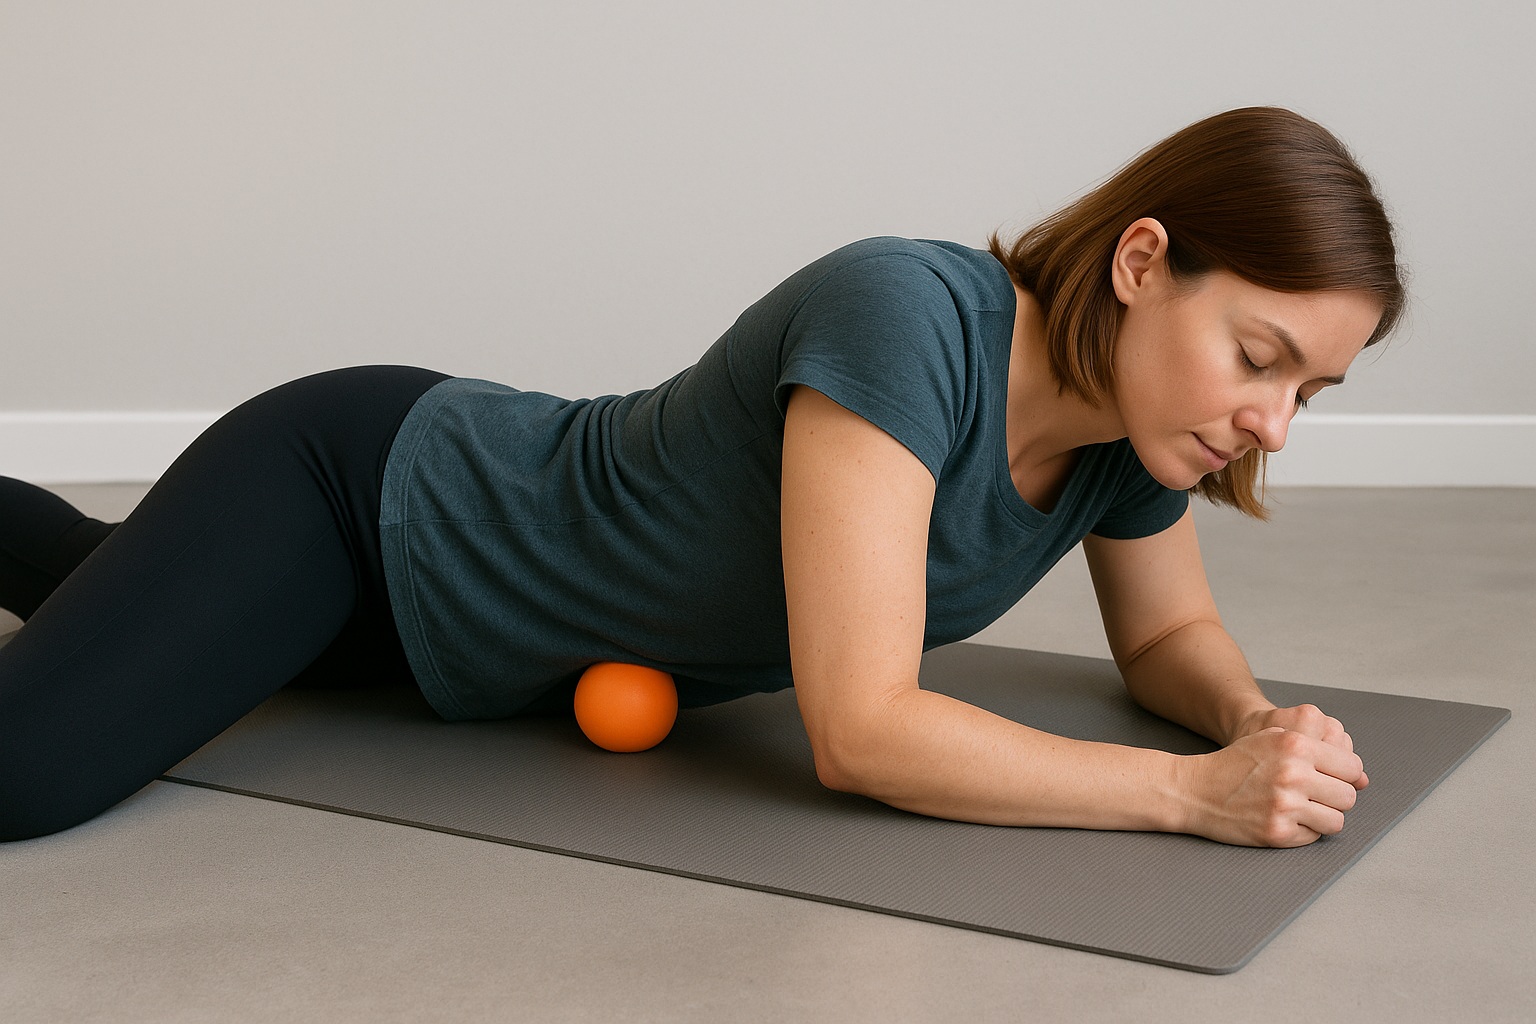
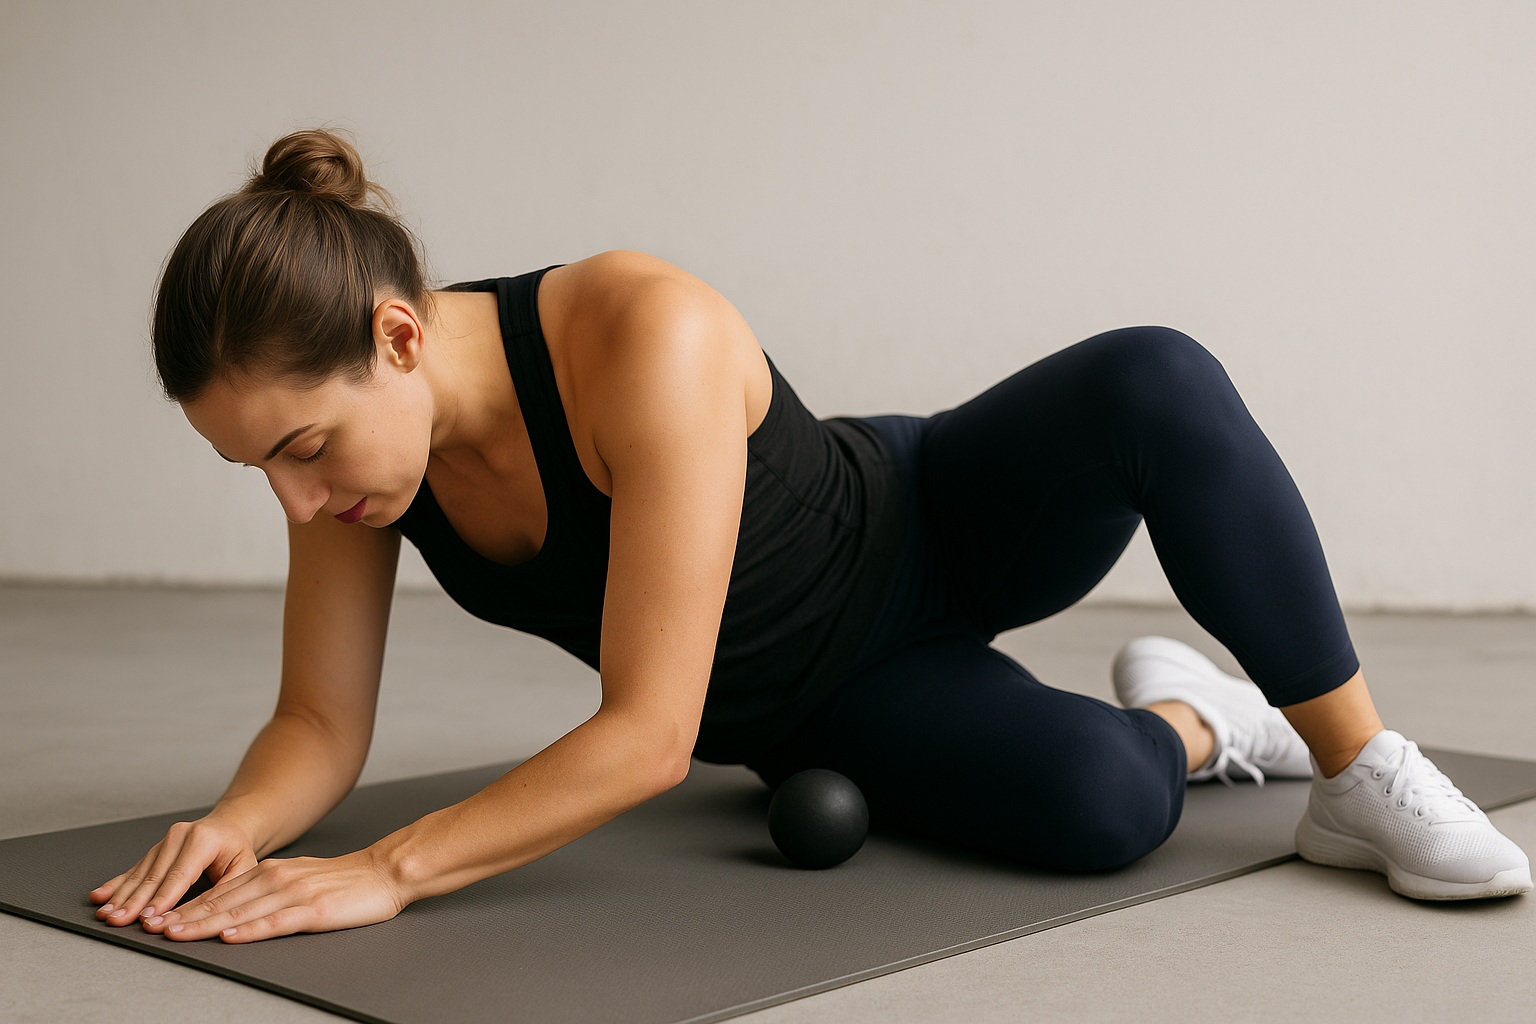
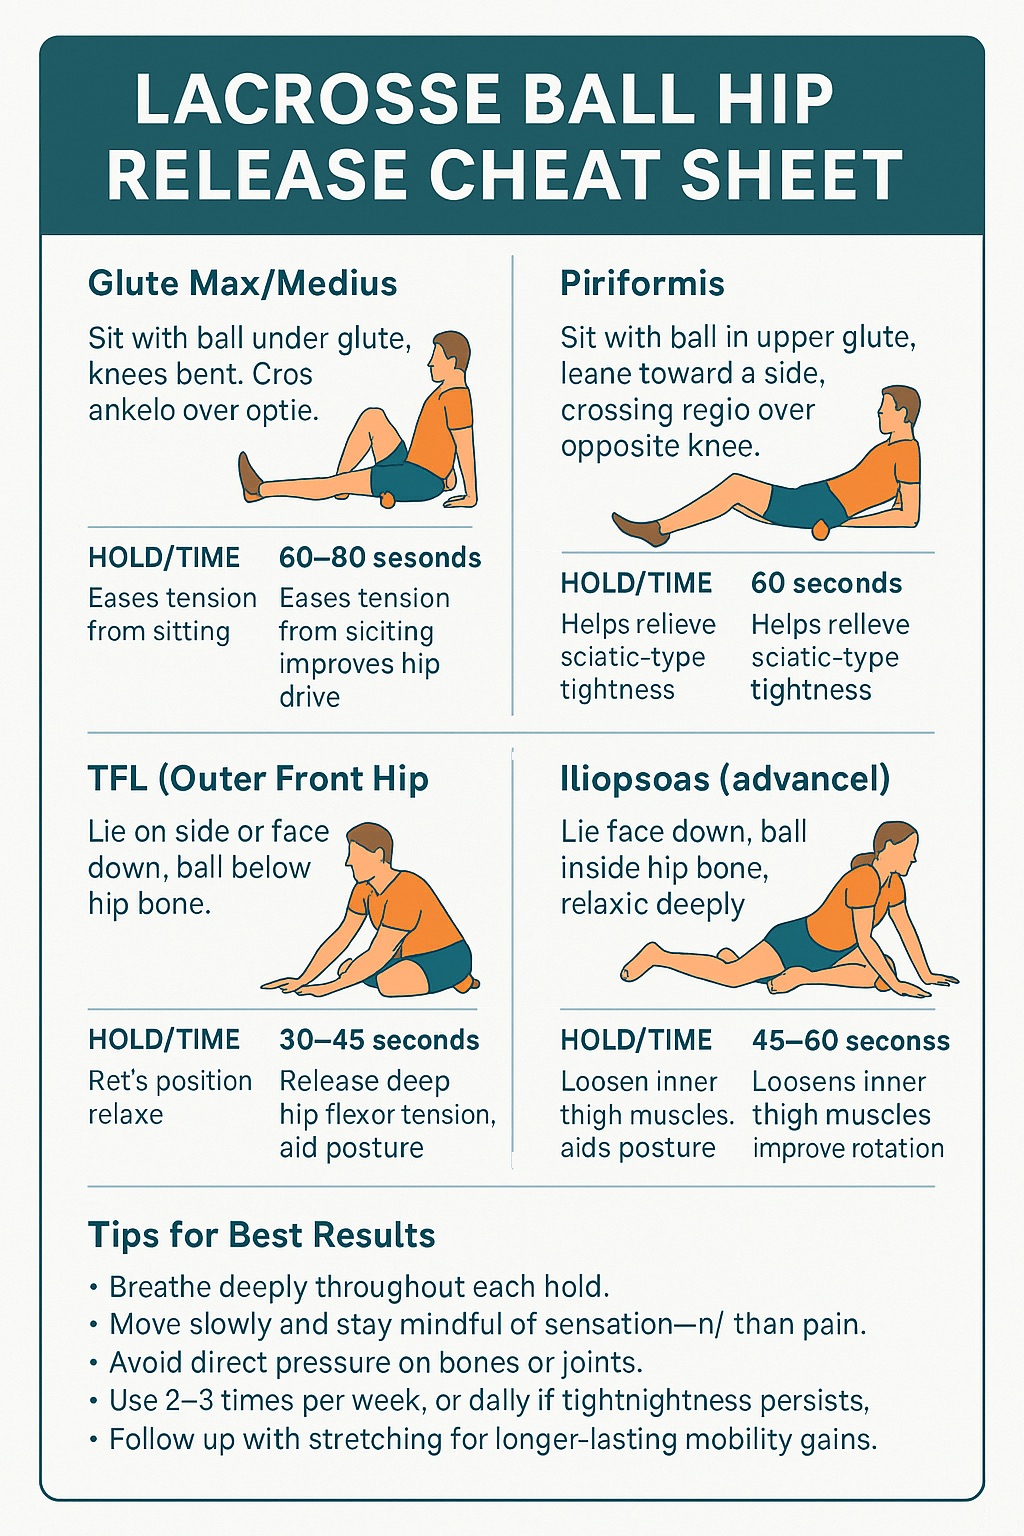
1. Gluteus Maximus and Medius Release (Buttocks and Outer Hip)
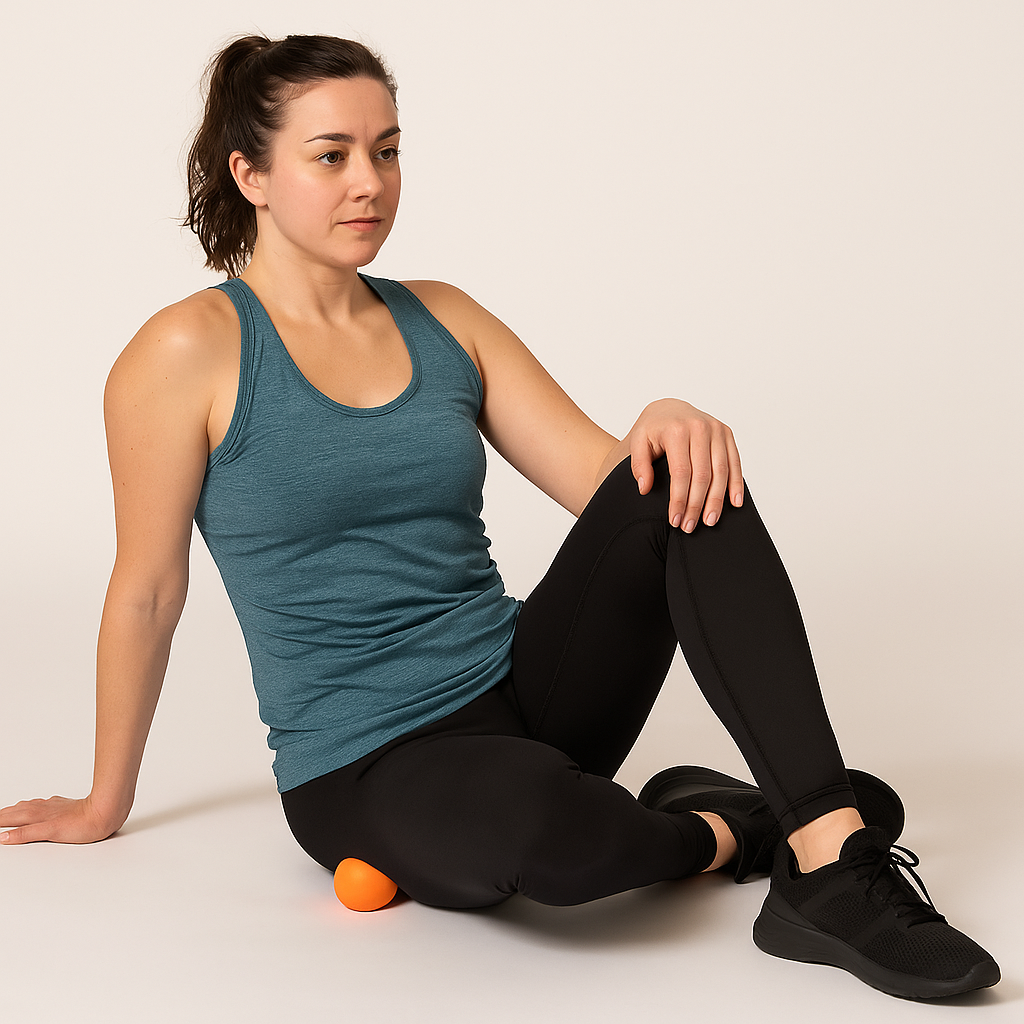
-
Sit on the floor with knees bent.
-
Place the lacrosse ball under one glute cheek.
-
Shift your weight onto the ball and slowly roll around.
-
When you find a tender spot, pause and hold pressure for 60–90 seconds.
-
To deepen the stretch, cross the ankle of the working leg over the opposite knee.
This helps release tension from prolonged sitting and improves hip stability.
2. Piriformis Release (Deep Gluteal Muscle)
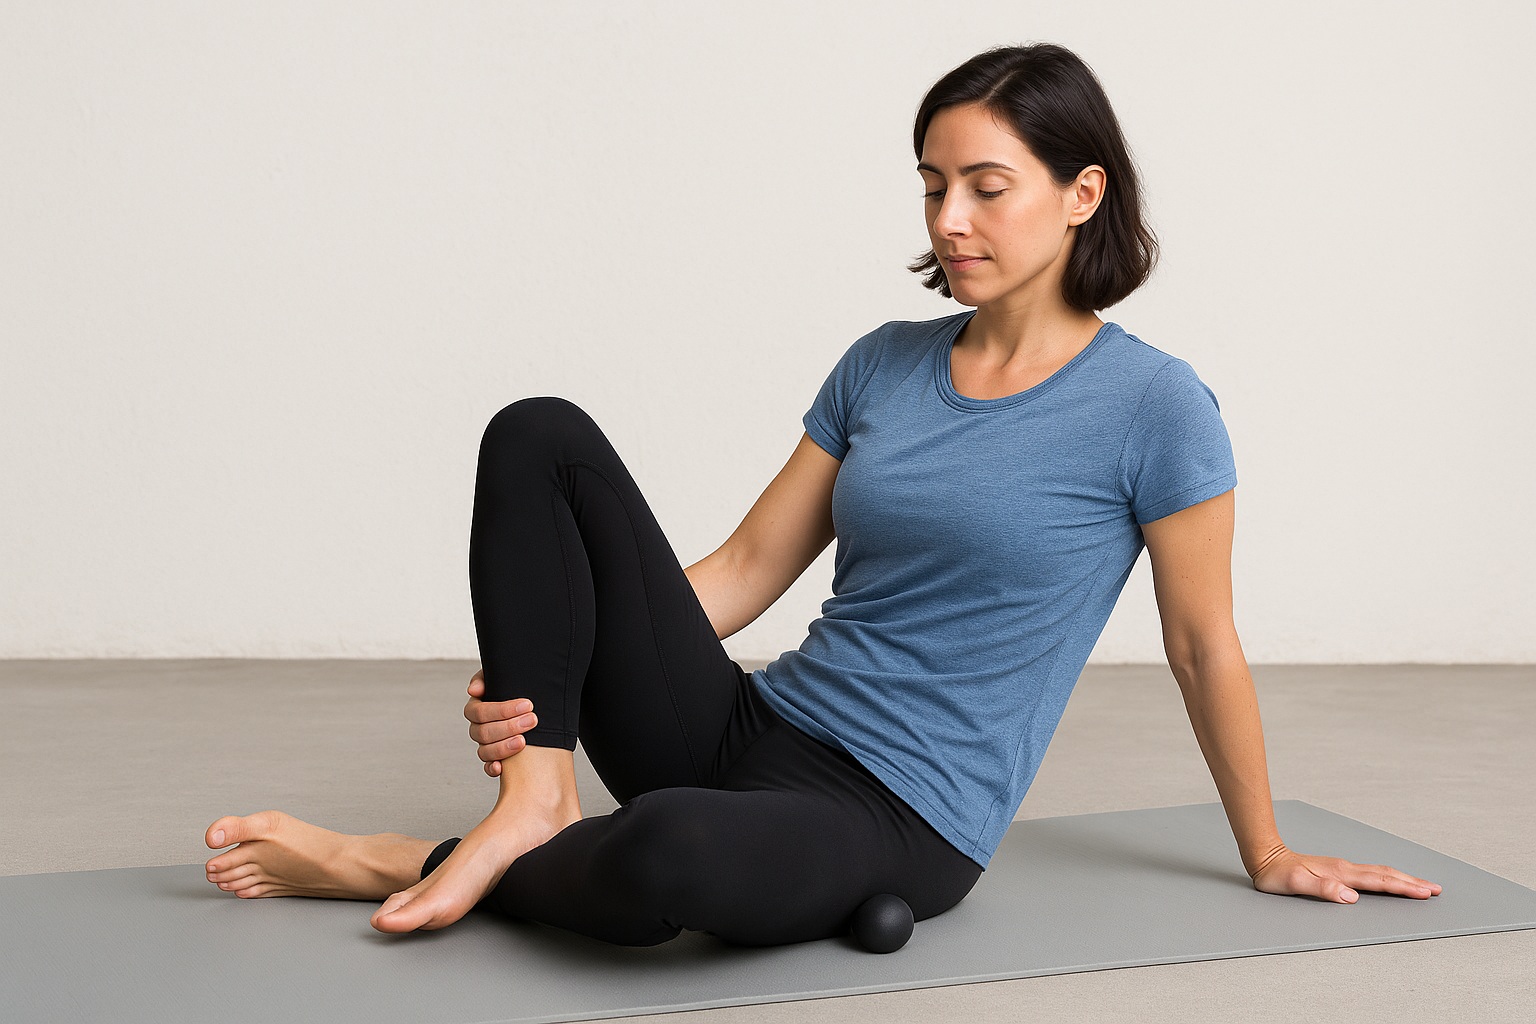
-
Sit on the floor and place the ball under the upper portion of one glute.
-
Cross the leg of the targeted side over the opposite knee.
-
Tilt slightly toward the ball and gently roll or hold on pressure points for 60 seconds.
This can relieve sciatic nerve tension and deep buttock tightness.
3. Tensor Fasciae Latae (TFL) Release (Outer Front Hip)
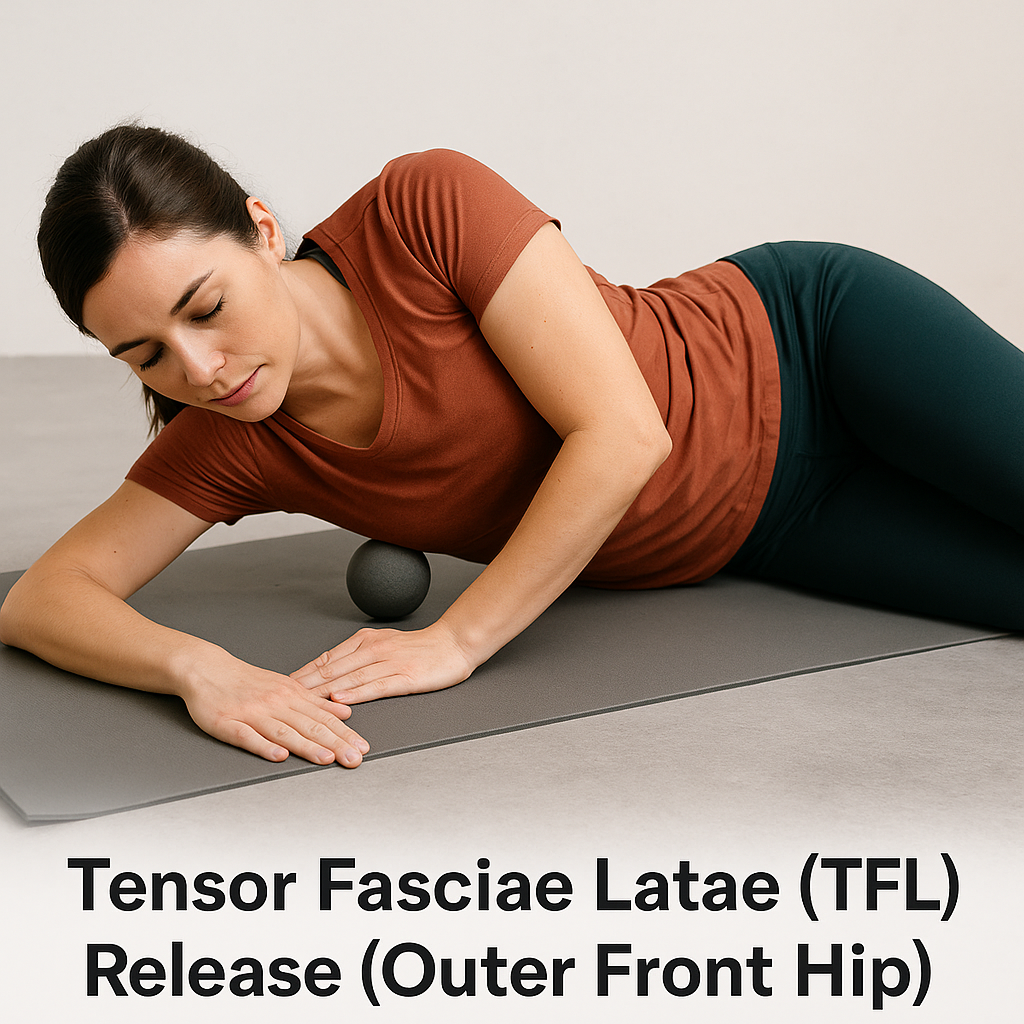
-
Lie face down or on your side.
-
Position the ball just below the bony part at the front of your hip.
-
Lean into the ball gently, supporting yourself on your forearms.
-
Roll or shift slightly to explore trigger points for 45–60 seconds.
Targeting the TFL reduces lateral hip tightness and improves gait.
4. Iliopsoas Release (Deep Hip Flexor) – Advanced
-
Lie face down and place the ball just inside your hip bone, below the beltline.
-
Relax and breathe into the pressure, keeping the opposite leg straight and the targeted leg slightly bent.
-
Hold steady pressure for 30–45 seconds.
This area is sensitive; avoid excessive pressure. Releasing the iliopsoas can alleviate deep hip tightness and lower back discomfort.
5. Adductor Release (Inner Thigh)
-
Lie face down with one leg bent to the side (frog position).
-
Place the ball under the inner thigh.
-
Slowly rock side-to-side or hold pressure for 45–60 seconds.
This reduces inner thigh tightness and improves hip mobility.
What to Do After the Release: Add Stretching
Once you’ve used the lacrosse ball to release tension, your muscles are in an ideal state to stretch. Think of the release as unlocking the door and stretching as walking through it. Adding hip-opening stretches right after can lead to even better mobility gains. Some great options include pigeon pose, the 90/90 hip stretch, or a deep lunge to target the hip flexors. You don’t need a long yoga session—just 5 minutes of mindful stretching can really help seal in the benefits of your lacrosse ball work.
Tips for Best Results
-
Breathe deeply to help muscles relax; holding your breath increases tension.
-
Move slowly and mindfully to allow your nervous system to adapt.
-
Avoid bony areas; focus on muscle and soft tissue.
-
Start with light pressure and increase gradually as tolerated.
-
Repeat 2–3 times per week or more depending on your activity level.
-
Combine lacrosse ball releases with hip stretches for enhanced flexibility.
Tips for Different Body Types and Experience Levels
Lacrosse ball release is versatile, but not everyone will experience it the same way. If you’re on the heavier side or have limited mobility, try starting by leaning against a wall instead of lying on the floor—this gives you more control over pressure. Older adults or those new to self-myofascial release may want to start with a slightly softer ball, like a tennis ball, to avoid discomfort. Don’t worry if it feels a bit awkward at first. With a little practice, you’ll find the angles and pressure that work best for your body.
Common Mistakes to Avoid
-
Rolling too fast, which prevents deep muscle release.
-
Using poor posture during self-massage.
-
Staying on one spot too long, which can bruise tissue.
-
Ignoring your breathing pattern.
Use This Hip Release Cheat Sheet
Want a simple way to stay consistent? Keep this cheat sheet handy—print it out or save it to your phone. It outlines the key lacrosse ball hip release techniques, target areas, and recommended hold times. Whether you’re at home, the gym, or even taking a break at work, this quick visual guide helps you remember the essentials and stay on track. The easier it is to follow, the more likely you are to stick with it—and that’s how real results happen.
How Long Until You See Results?
Many people feel immediate relief after the first session. However, consistent practice over several weeks (around 10 sessions) can lead to lasting improvements in hip stiffness and range of motion, according to sports therapy research.
Who Should Avoid Lacrosse Ball Hip Releases?
While lacrosse ball work can be incredibly helpful, it’s not for everyone. If you’ve recently had surgery—especially hip replacements—or have conditions like osteoporosis or joint instability, it’s best to skip this technique unless cleared by your doctor. People with nerve-related conditions like sciatica should also approach with caution, especially when working near the piriformis or iliopsoas. And if you’re pregnant, it’s a good idea to avoid deep pressure around the abdomen, such as during iliopsoas release. The general rule? If you’re unsure or dealing with chronic pain, talk to a physical therapist first to make sure this kind of self-release is safe for your situation.
Not Just a Lacrosse Ball: Tools You Can Use
While the lacrosse ball is a fantastic all-around tool, it’s not your only option. For slightly larger muscle groups or broader pressure, a foam roller or massage gun can be great alternatives. If you’re dealing with very specific tension points, a peanut ball (two lacrosse balls taped together) can target the low back and glutes more comfortably. And for those who are more advanced in their mobility work, tools like voodoo floss bands or mobility canes offer more dynamic options. The goal is the same—find what works best for your body and your needs.
Frequently Asked Questions
Is a lacrosse ball better than a foam roller for hips?
Yes. Lacrosse balls provide more precise, deeper pressure for small, tight hip muscles, while foam rollers are better for larger muscle groups.
How often should I do lacrosse ball hip releases?
2–3 times per week is sufficient for maintenance. Daily use is fine if your hips are very tight.
Can this help with lower back pain?
Yes. Loosening tight hips often reduces compensatory tension in the lower back.
Can I use a tennis ball instead?
You can, but tennis balls are softer and may not provide enough pressure for deep release.
Final Thoughts
Incorporating lacrosse ball hip releases into your self-care routine is a powerful way to relieve pain, improve mobility, and support long-term hip health. Whether you are an athlete, desk worker, or active individual, dedicating 10–15 minutes a few times per week to targeted lacrosse ball massage can unlock your hips, reduce discomfort, and enhance your overall movement quality.

Pingback: How to Use a Lacrosse Ball for Hip Pain: A Complete Guide for Women, Seniors, and Anyone Seeking Relief - Wellness Readers Digest
Pingback: Using Lacrosse Balls for Myofascial Release: Benefits, Techniques, and Exercises - Wellness Readers Digest