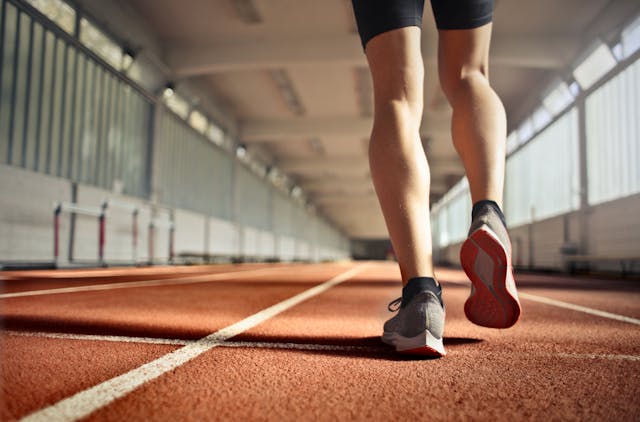
It’s common knowledge that increasing physical activity is necessary to maintain mobility and activity as we age. However, it’s simple to find ourselves sitting more and moving less due to the demands of modern life. Tight hips, short hip flexors, and a variety of other problems that affect our posture, balance, and general health can result from this sedentary lifestyle. However, what if there was a potent yoga pose that could help fight off all of this? The low lunge, or Anjaneyasana, is a powerful exercise that can improve the health of your lower body and maintain your strength and flexibility as you age, according to yoga and fitness experts.
The low lunge, also known as anjaneyasana, is a pose that integrates strengthening, balance, and stretching into one easy movement. Whether you are a novice or an experienced yogi, adding this pose to your daily practice can have many advantages, such as relieving lower back and hip tension and strengthening your body for more difficult poses.
We’ll cover everything you need to know about the low lunge in this extensive guide. We’ll go over its many advantages, give you a thorough, step-by-step tutorial to help you become proficient in the pose, and point out the main distinctions between a low lunge and its high lunge counterpart. In order to make sure you can find a version that suits your body, regardless of your level of fitness or physical limitations, we’ll also go over a few variations. You will be prepared to unfold your mat and begin enjoying the benefits of this amazing pose by the end of this article.
What Is a Low Lunge Good For?
The low lunge is an exceptional pose for anyone looking to improve their lower-body health. It’s particularly beneficial for individuals who spend a lot of time sitting, as it directly targets and stretches the muscles that become tight from prolonged periods of inactivity. Here’s a closer look at what makes this pose so good for your body.
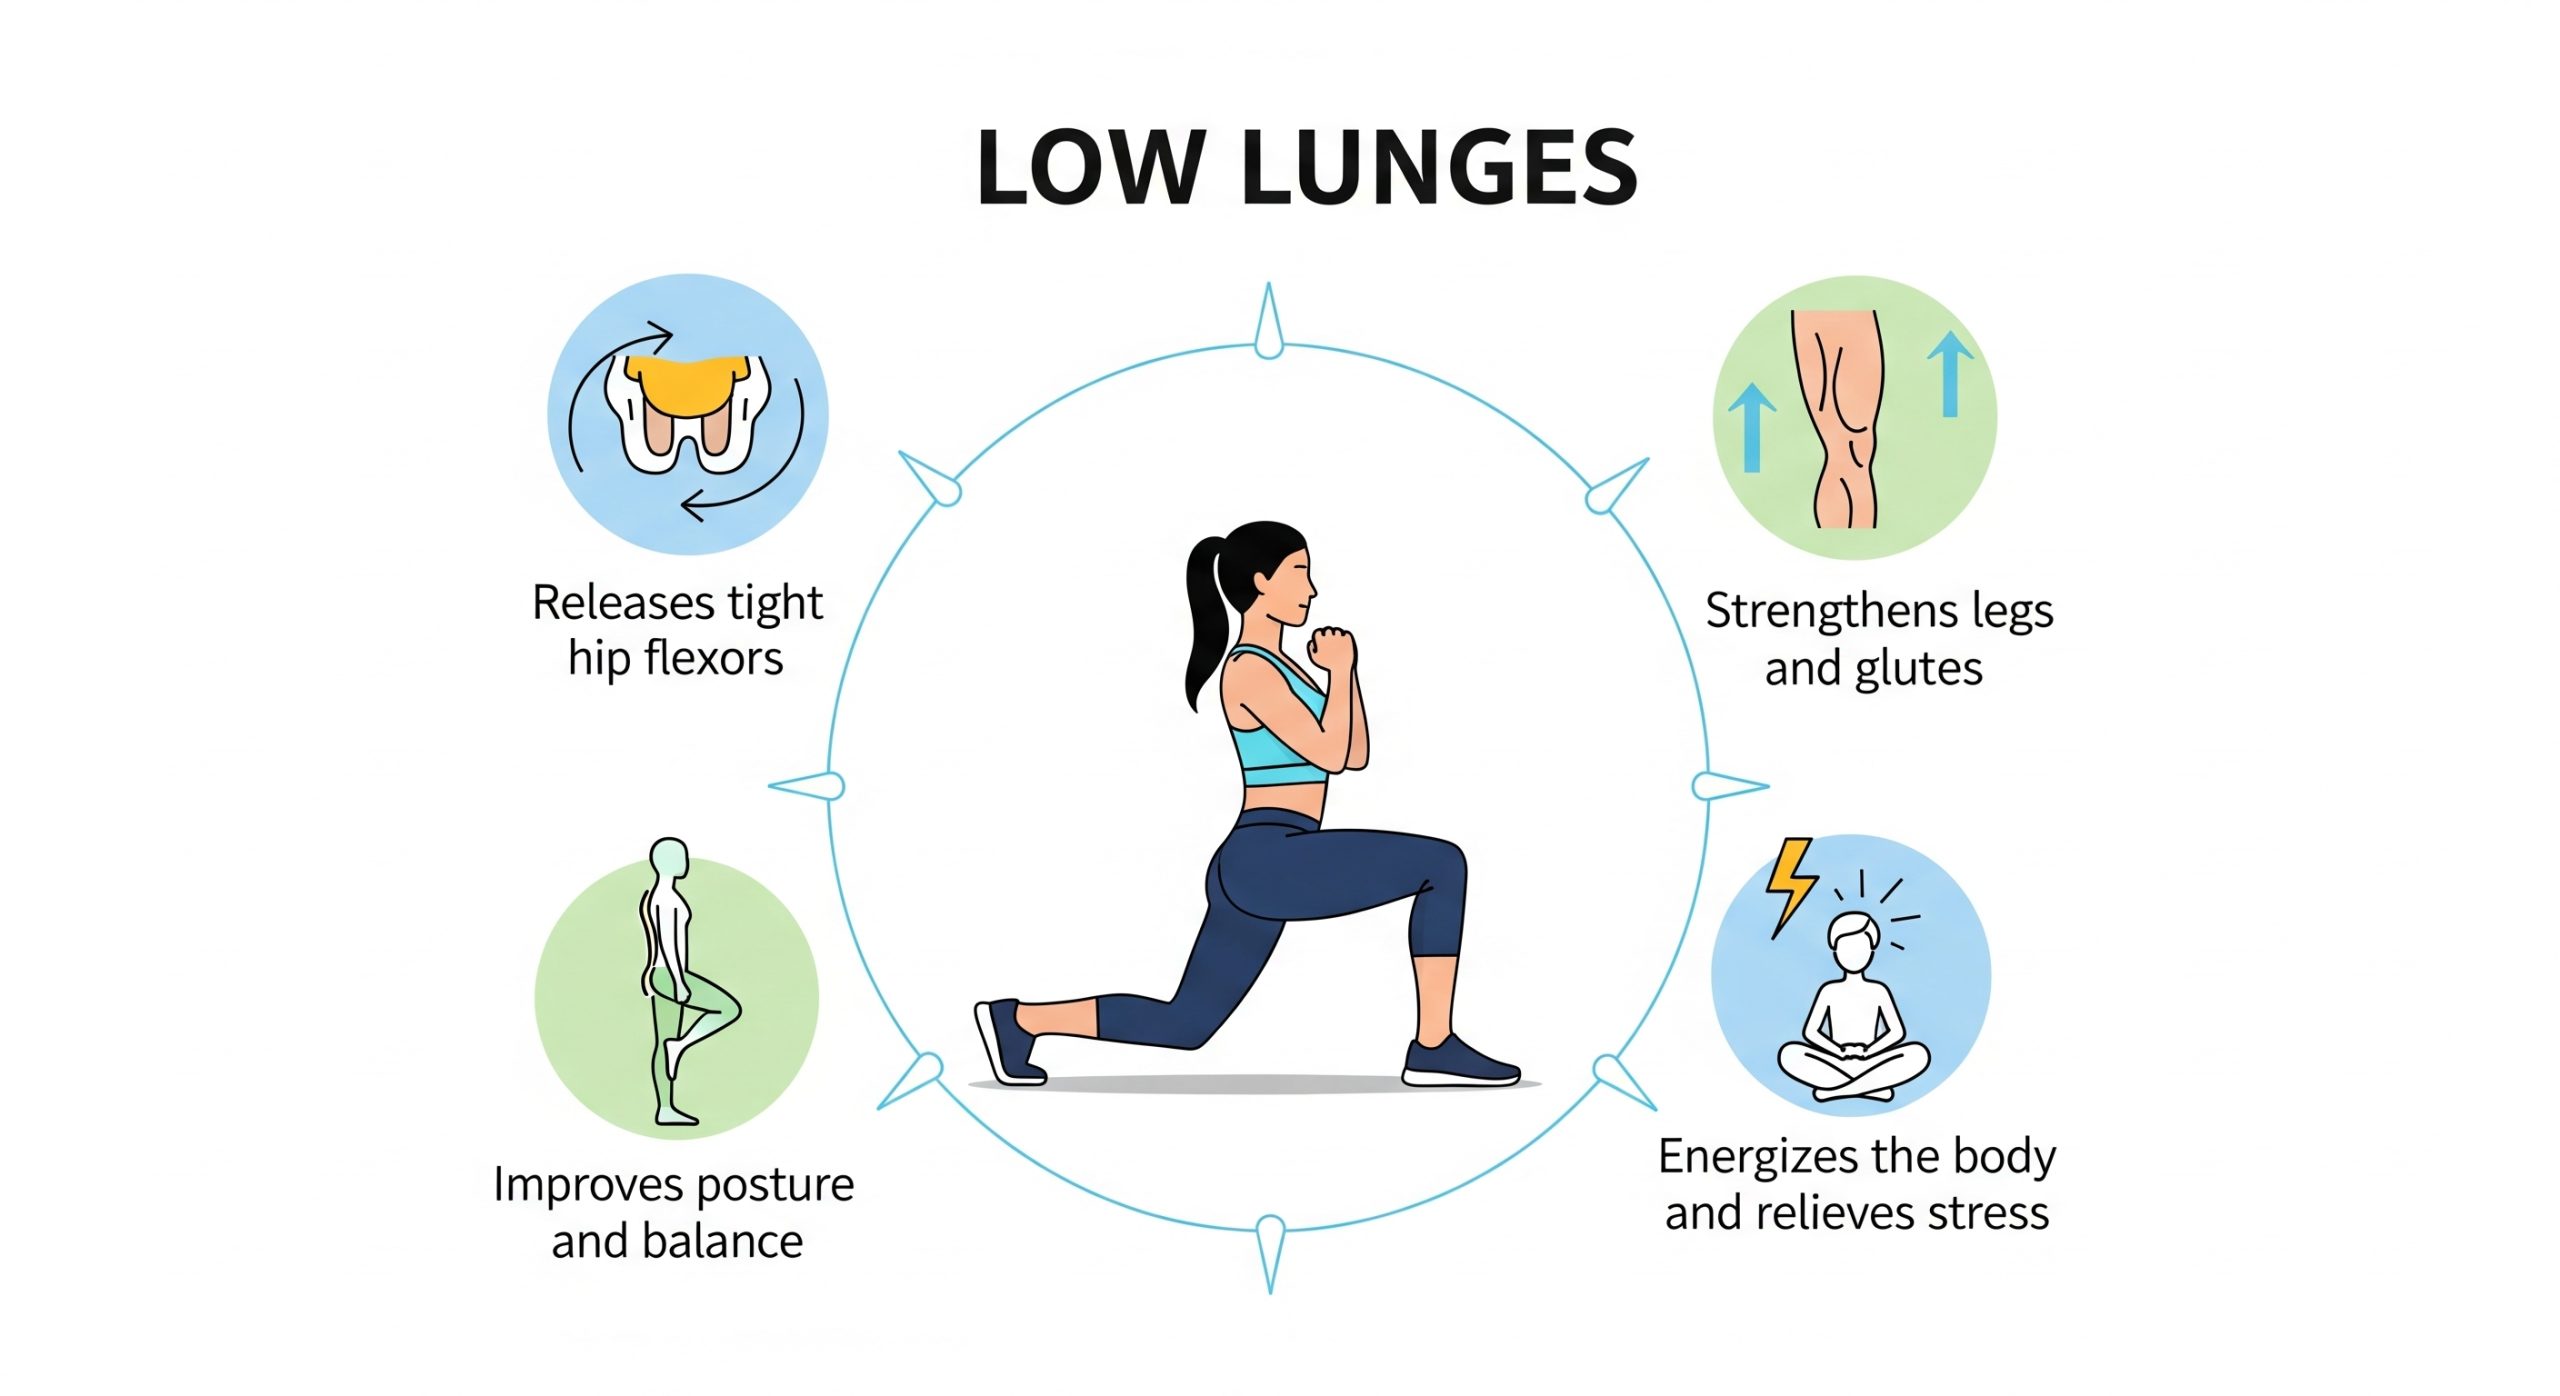
Releasing Tight Hip Flexors
Stretching the psoas muscle and hip flexors is the main advantage of the low lunge. Sitting frequently causes these frontal hip muscles to shorten and tighten. Lower back pain may result from this tightness pulling your pelvis forward and creating an anterior pelvic tilt. By gradually lengthening these muscles, the low lunge helps to relieve lower back pain and return the pelvis to a neutral position.
Strengthening Your Legs and Glutes
The low lunge is a potent strengthening pose in addition to its reputation for deep stretching. To sustain stability and support your body weight, you must contract the muscles in your front leg, such as your quadriceps, hamstrings, and glutes. Your lower body strength and endurance are increased with this isometric hold, which is crucial for increasing your general mobility and making daily tasks like walking and climbing stairs easier and more effective.
Improving Posture and Balance
The low lunge directly improves posture by strengthening the leg and core muscles and stretching the hip flexors. Your spine is firmly supported by a strong core and stable pelvis, which makes you stand taller and less likely to slouch. The pose also tests your balance because you have to use your stabilizing muscles and core to stay upright. As you age, this exercise helps you avoid falls and injuries by improving your balance and coordination.
Energizing the Body and Relieving Stress
The low lunge is a heart-opening pose, just like many others in yoga. You can relieve accumulated tension by creating space across your shoulders and chest as you raise your chest and extend your arms overhead. The body can be energized and blood circulation can be improved by this expansive movement. The pose is a great way to relieve physical and mental stress because it involves deep, deliberate breathing that also helps to calm the nervous system.
Low Lunge vs. High Lunge: What’s the Difference?
While the low lunge and high lunge may look similar, they have one key difference that dramatically changes the pose: the back leg.
- Low Lunge (Anjaneyasana): In a low lunge, the back knee rests on the floor. This modification makes the pose more accessible for beginners and allows for a deeper, more targeted stretch of the hip flexors and quadriceps of the back leg. With the back knee on the ground, the pose provides more stability, making it an ideal choice for focusing on alignment and form.
- High Lunge (Ashta Chandrasana): In a high lunge, the back knee is lifted off the ground, and the back leg is straight and engaged. This variation requires more leg strength, core engagement, and balance. It places more emphasis on building strength in the quadriceps and glutes of both legs and is a more intense pose for stretching the hip flexor of the back leg.
The choice between a low lunge and a high lunge depends on your goals and current physical condition. If you are new to lunges or are looking for a gentle, restorative stretch, the low lunge is the perfect starting point. If you want to build more strength and challenge your balance, you can progress to a high lunge.
How to Do a Low Lunge: Step-by-Step Instructions
To get the most out of your low lunge and avoid injury, proper form is essential. Follow these step-by-step instructions to master the pose safely and effectively.
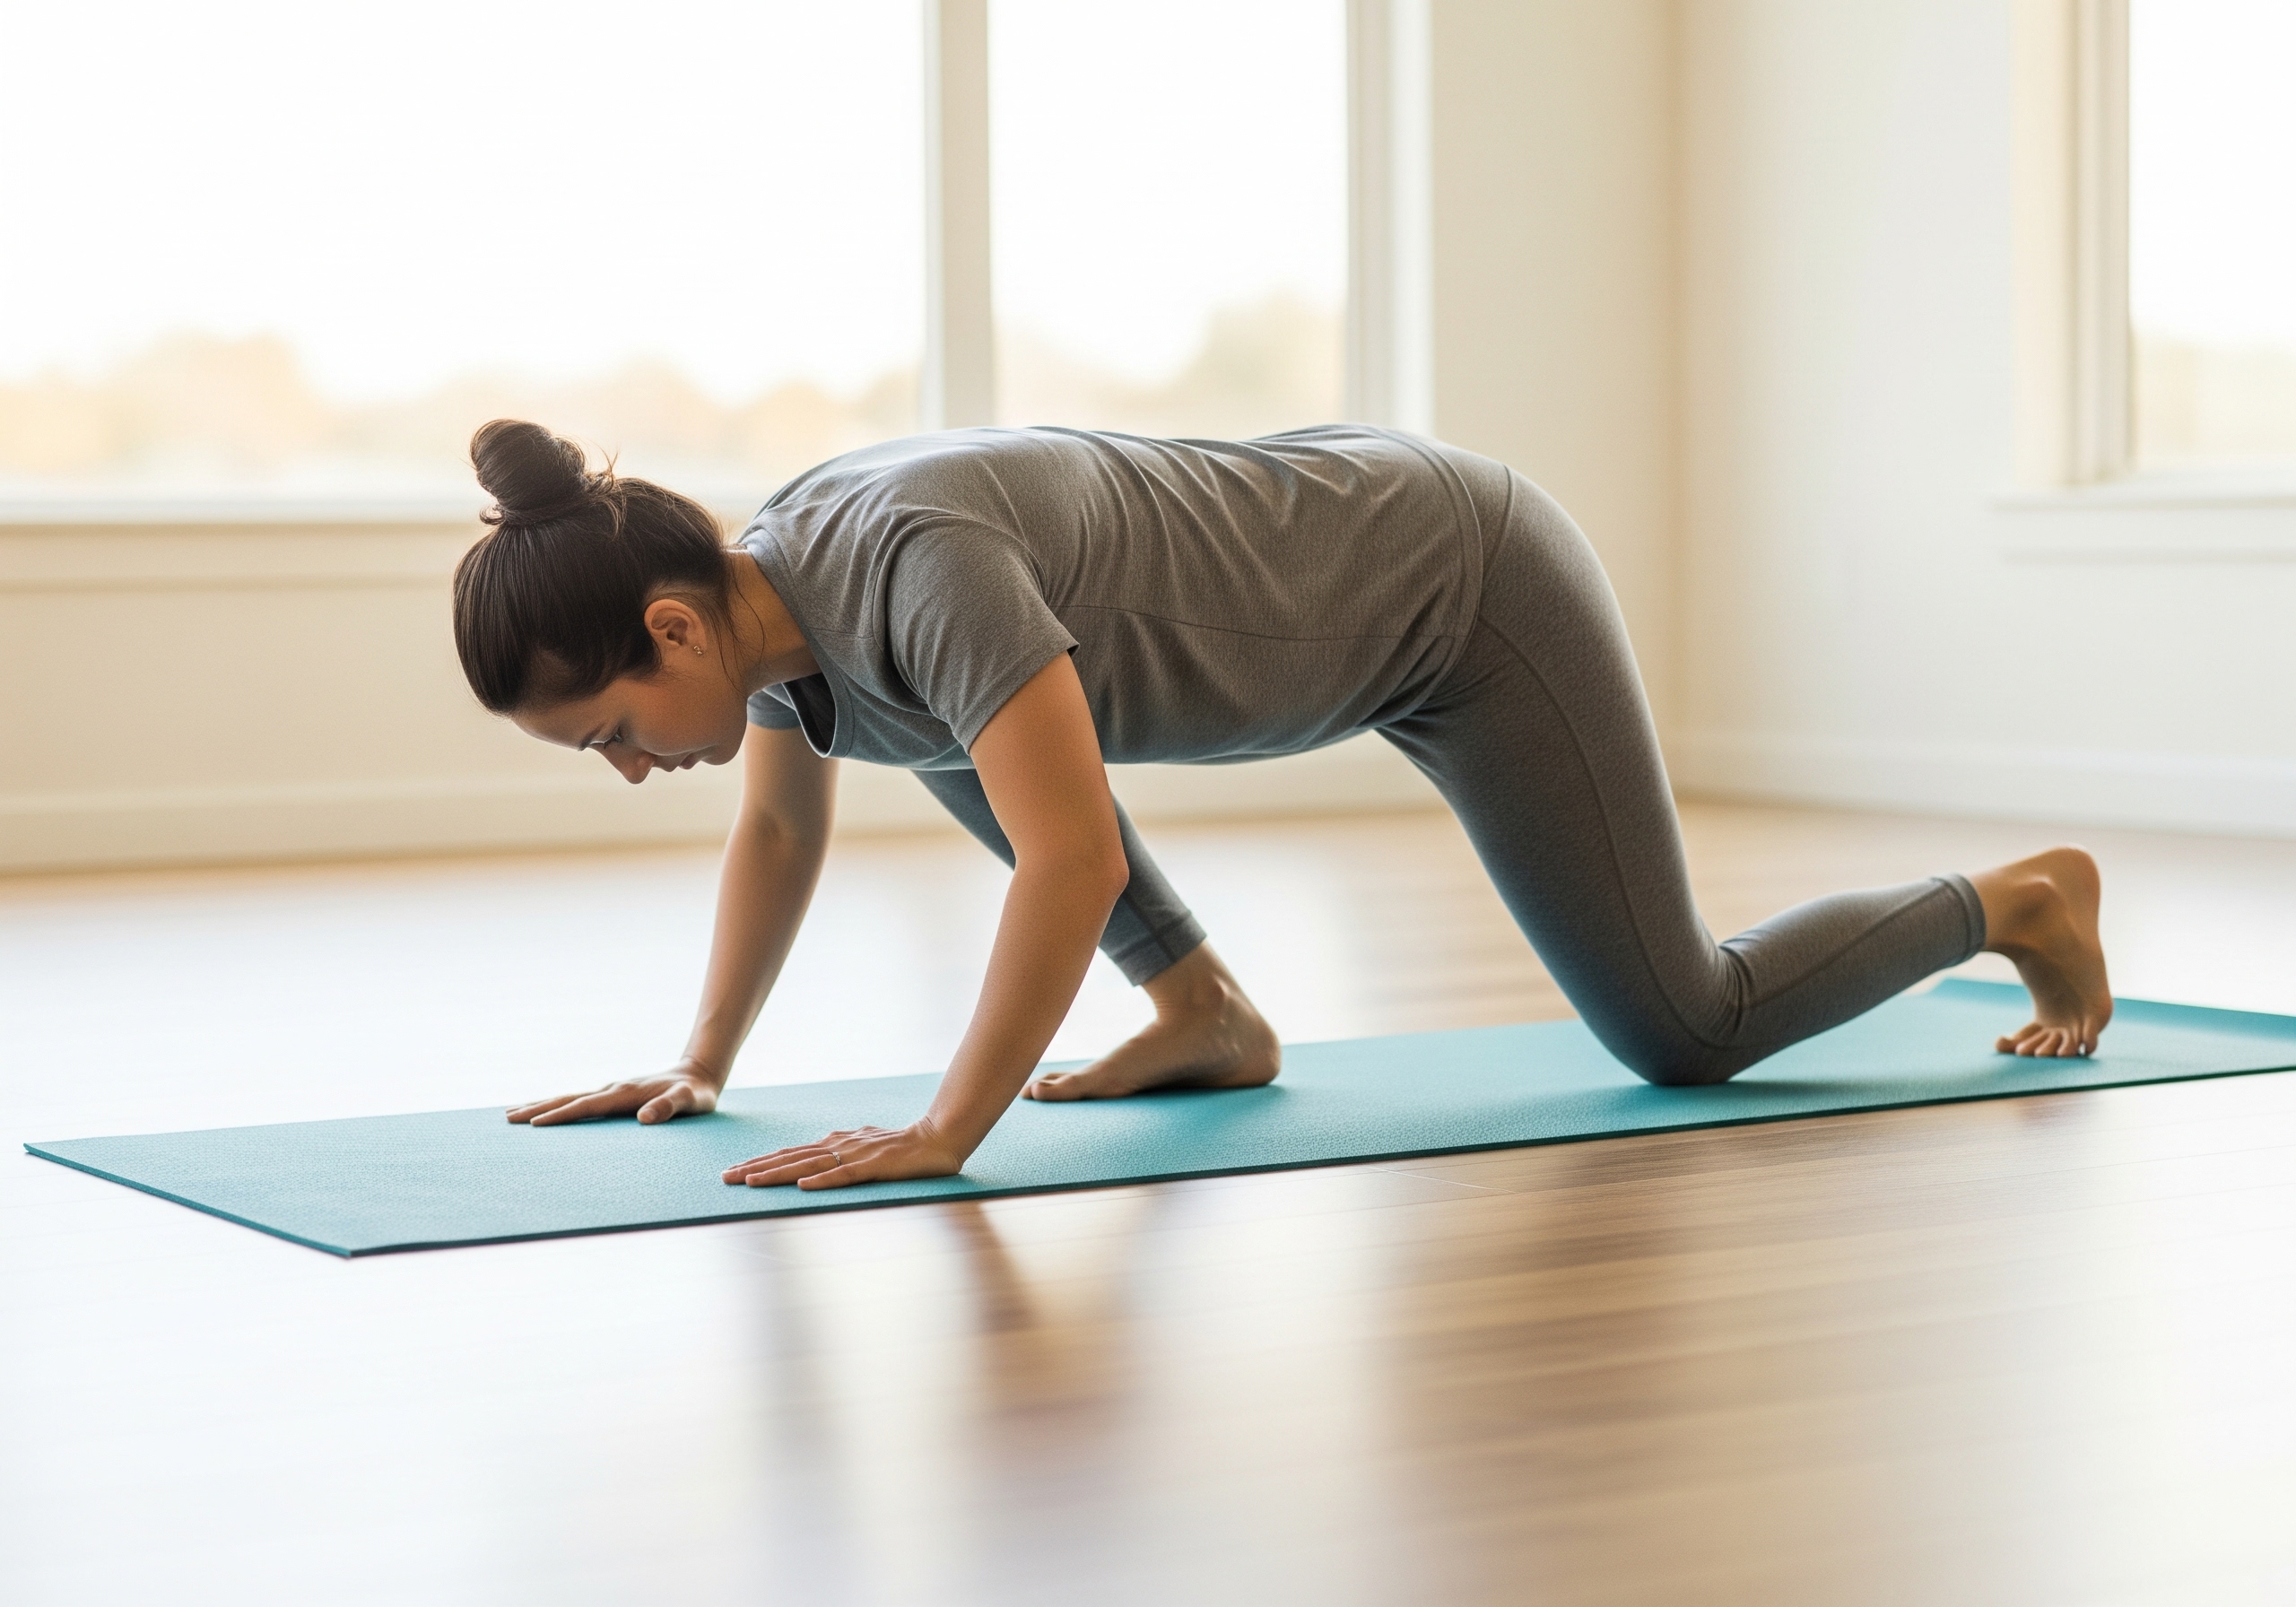
Step 1: Start in a Kneeling Position
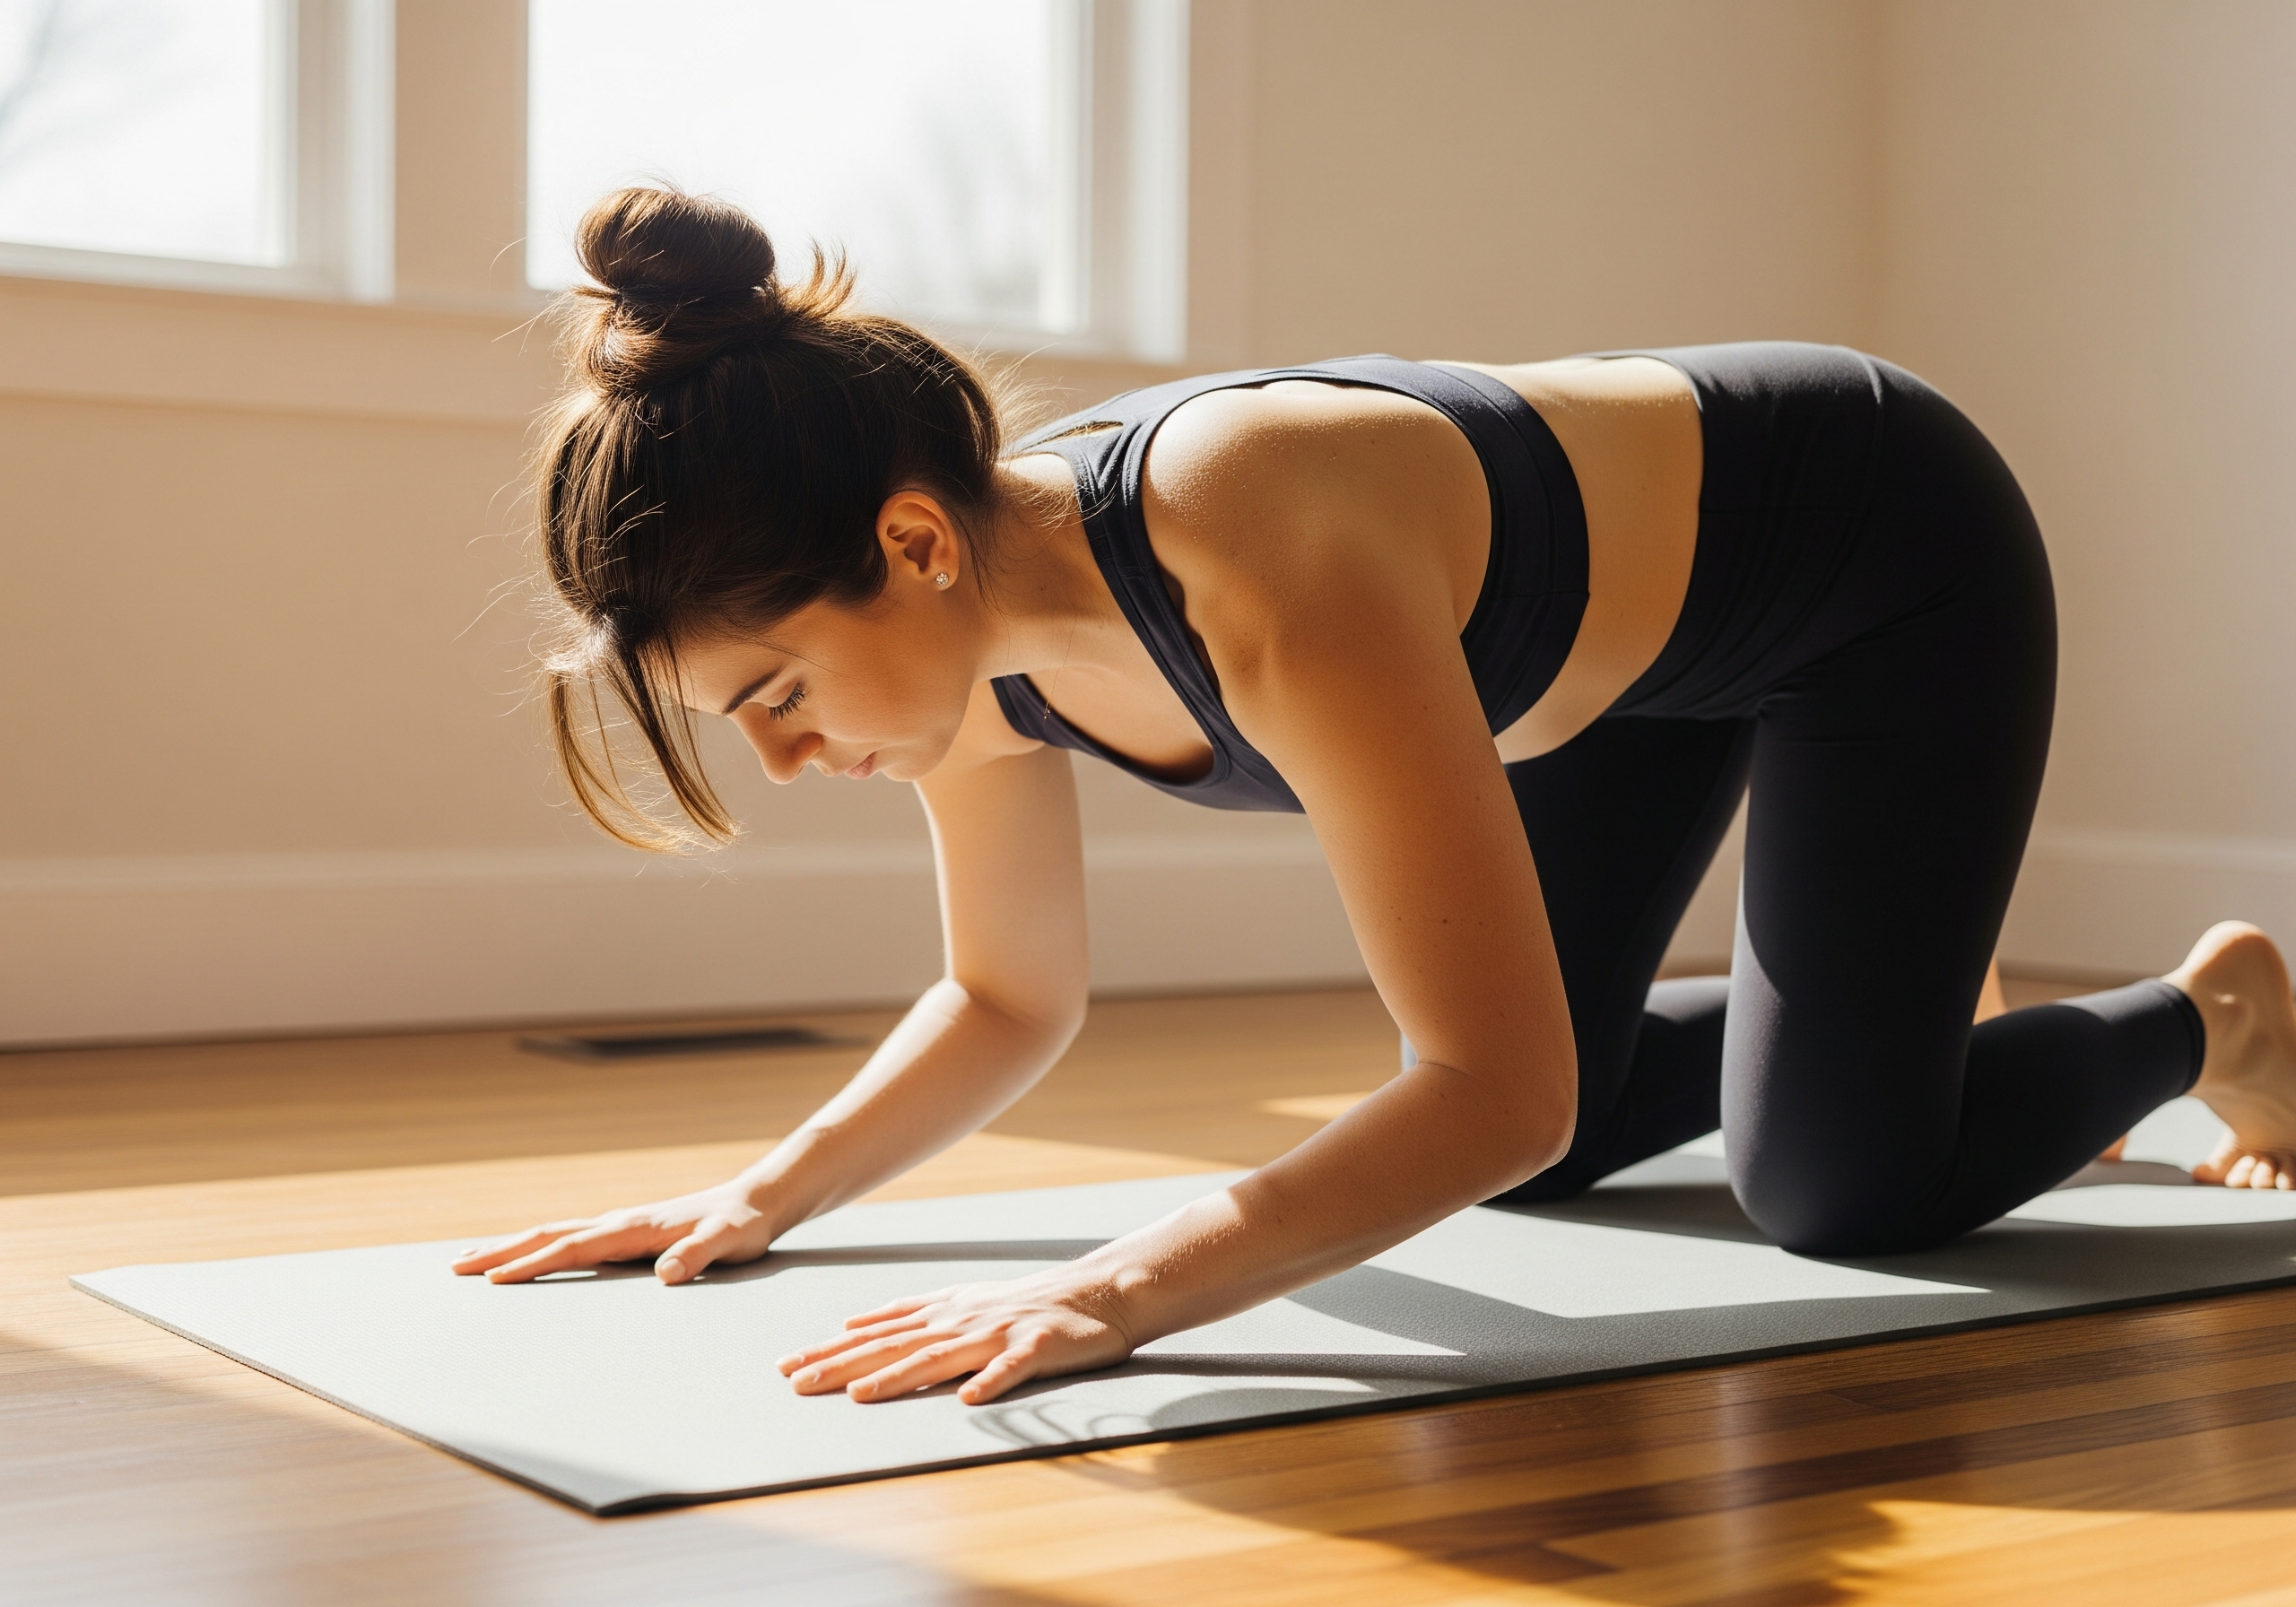
Begin on your hands and knees in a tabletop position. Ensure your wrists are directly under your shoulders and your knees are under your hips. This is your starting point and helps ensure your body is properly aligned.
Step 2: Step Forward
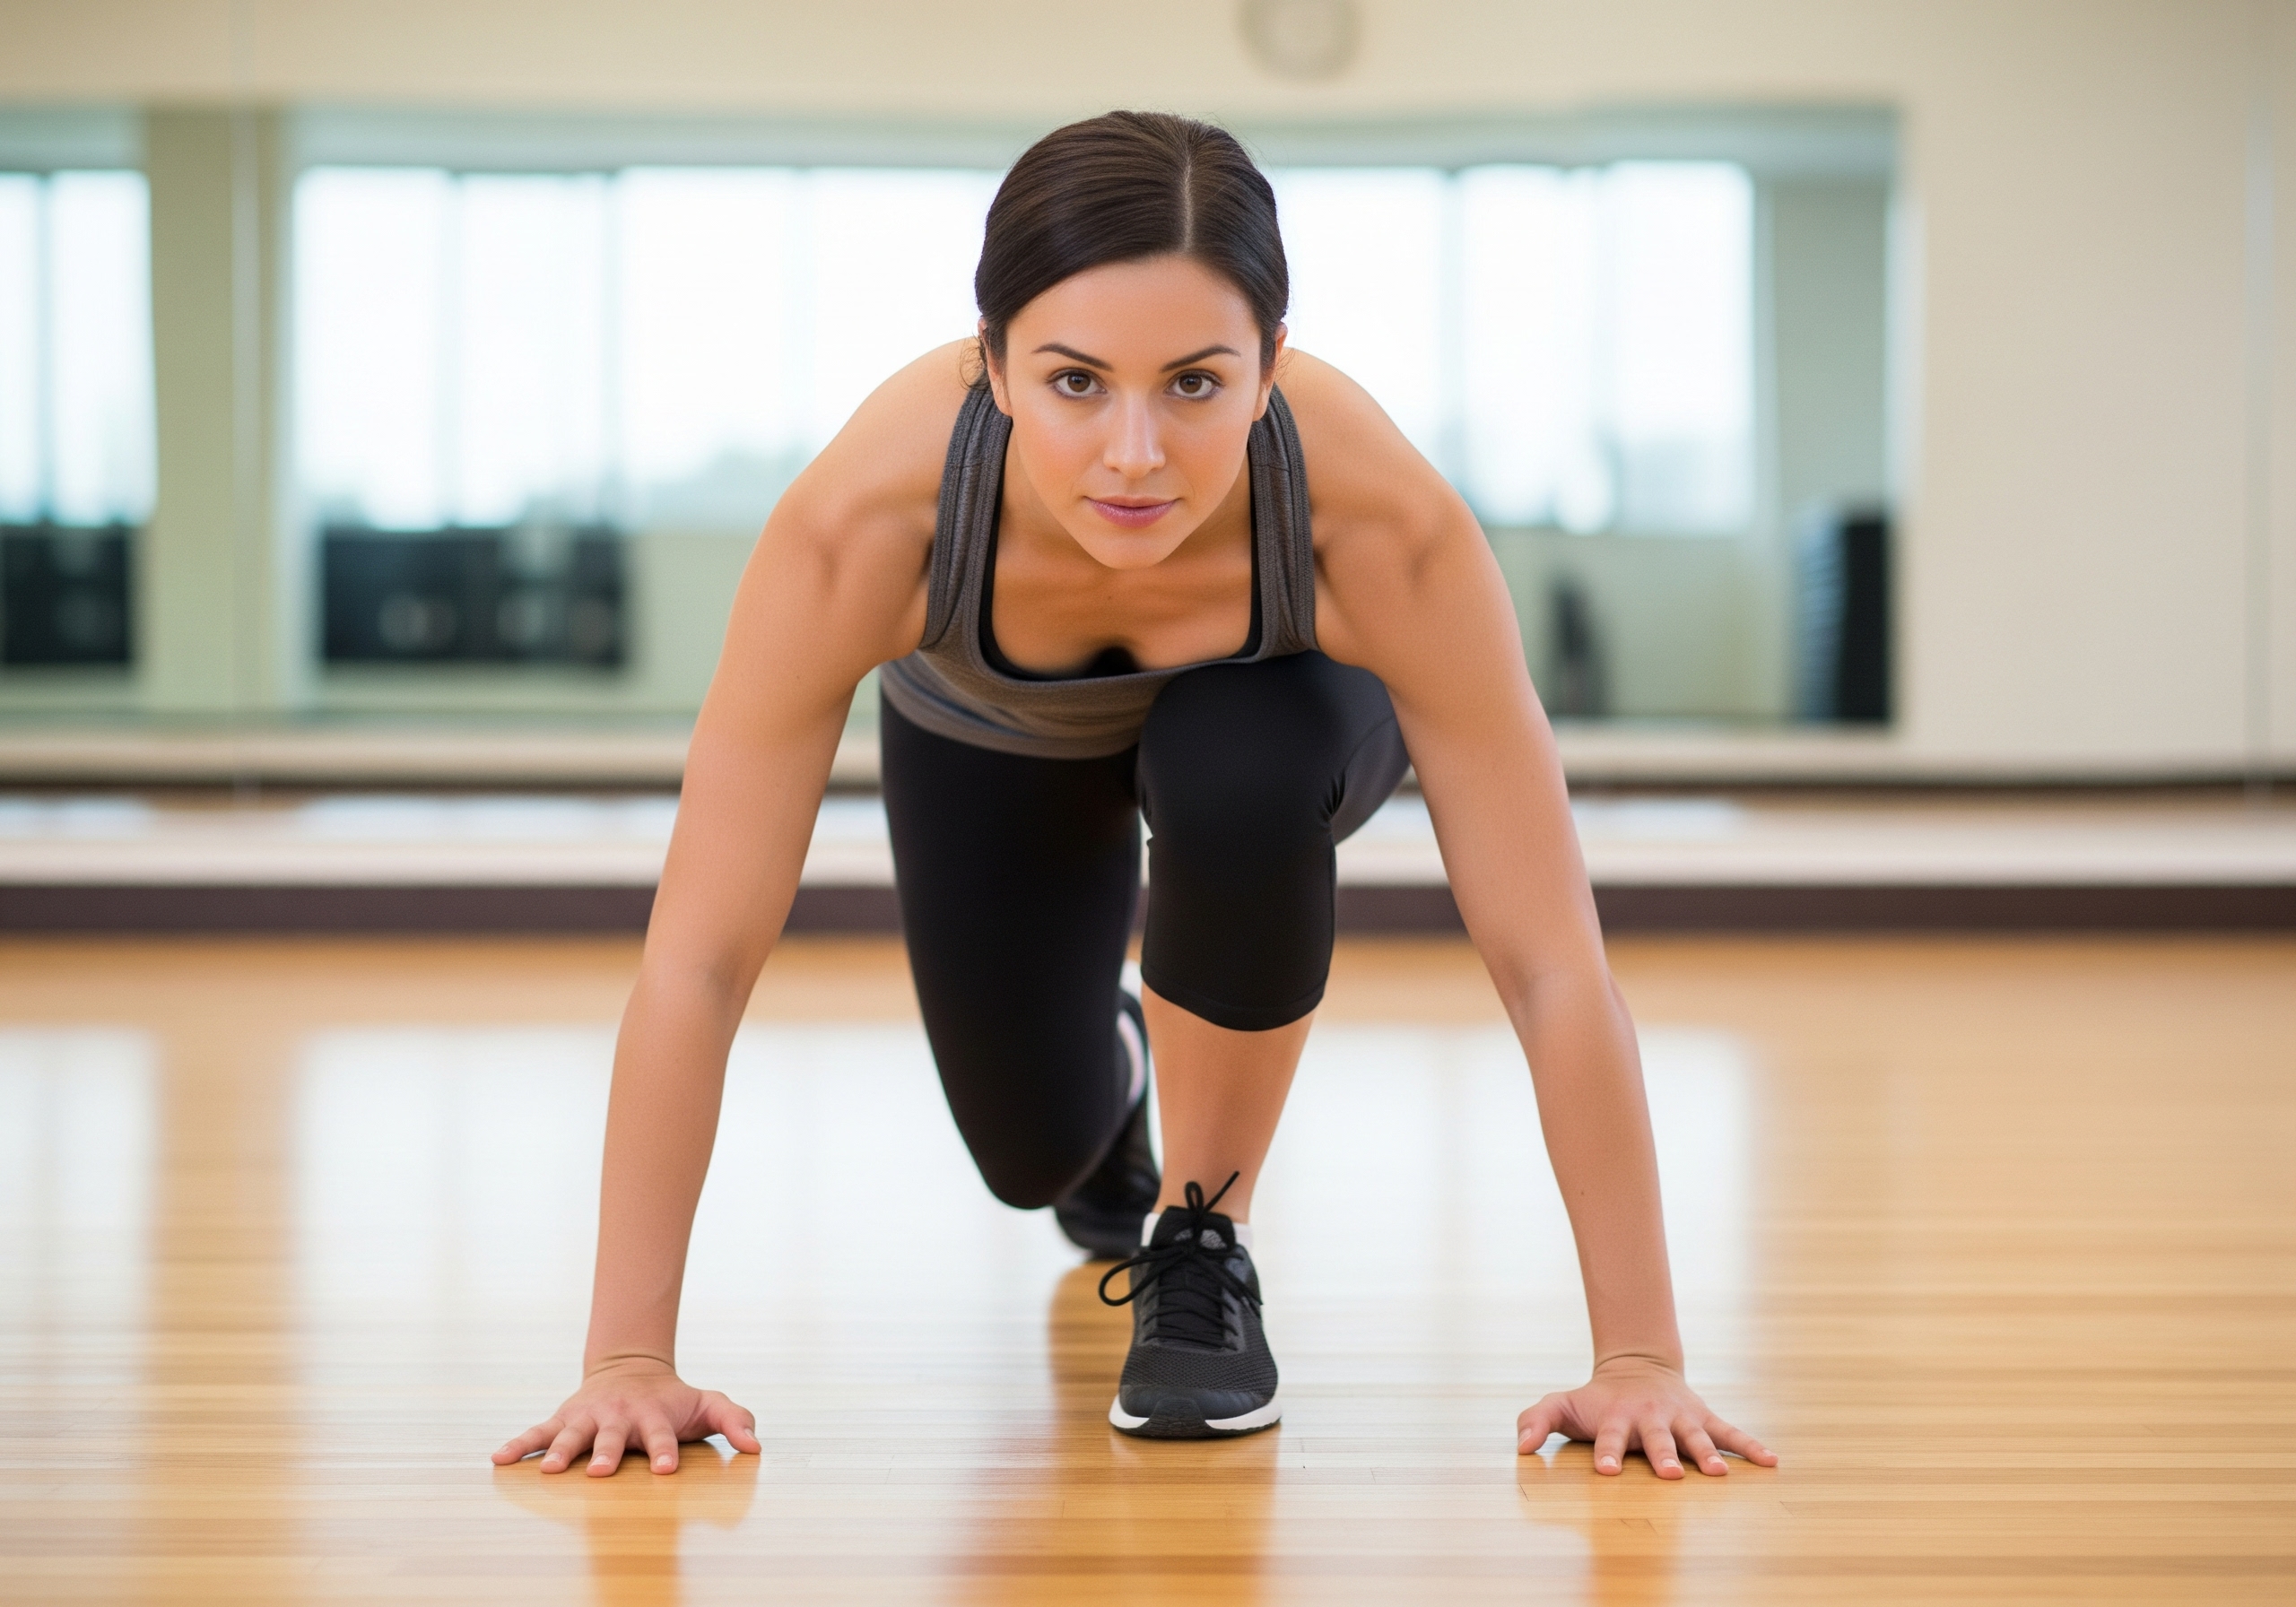
On an exhalation, step your right foot forward, placing it between your hands. Adjust your stance so your right knee is stacked directly over your right ankle, creating a 90-degree angle. This alignment is crucial to protect your knee joint.
Step 3: Lower Your Hips
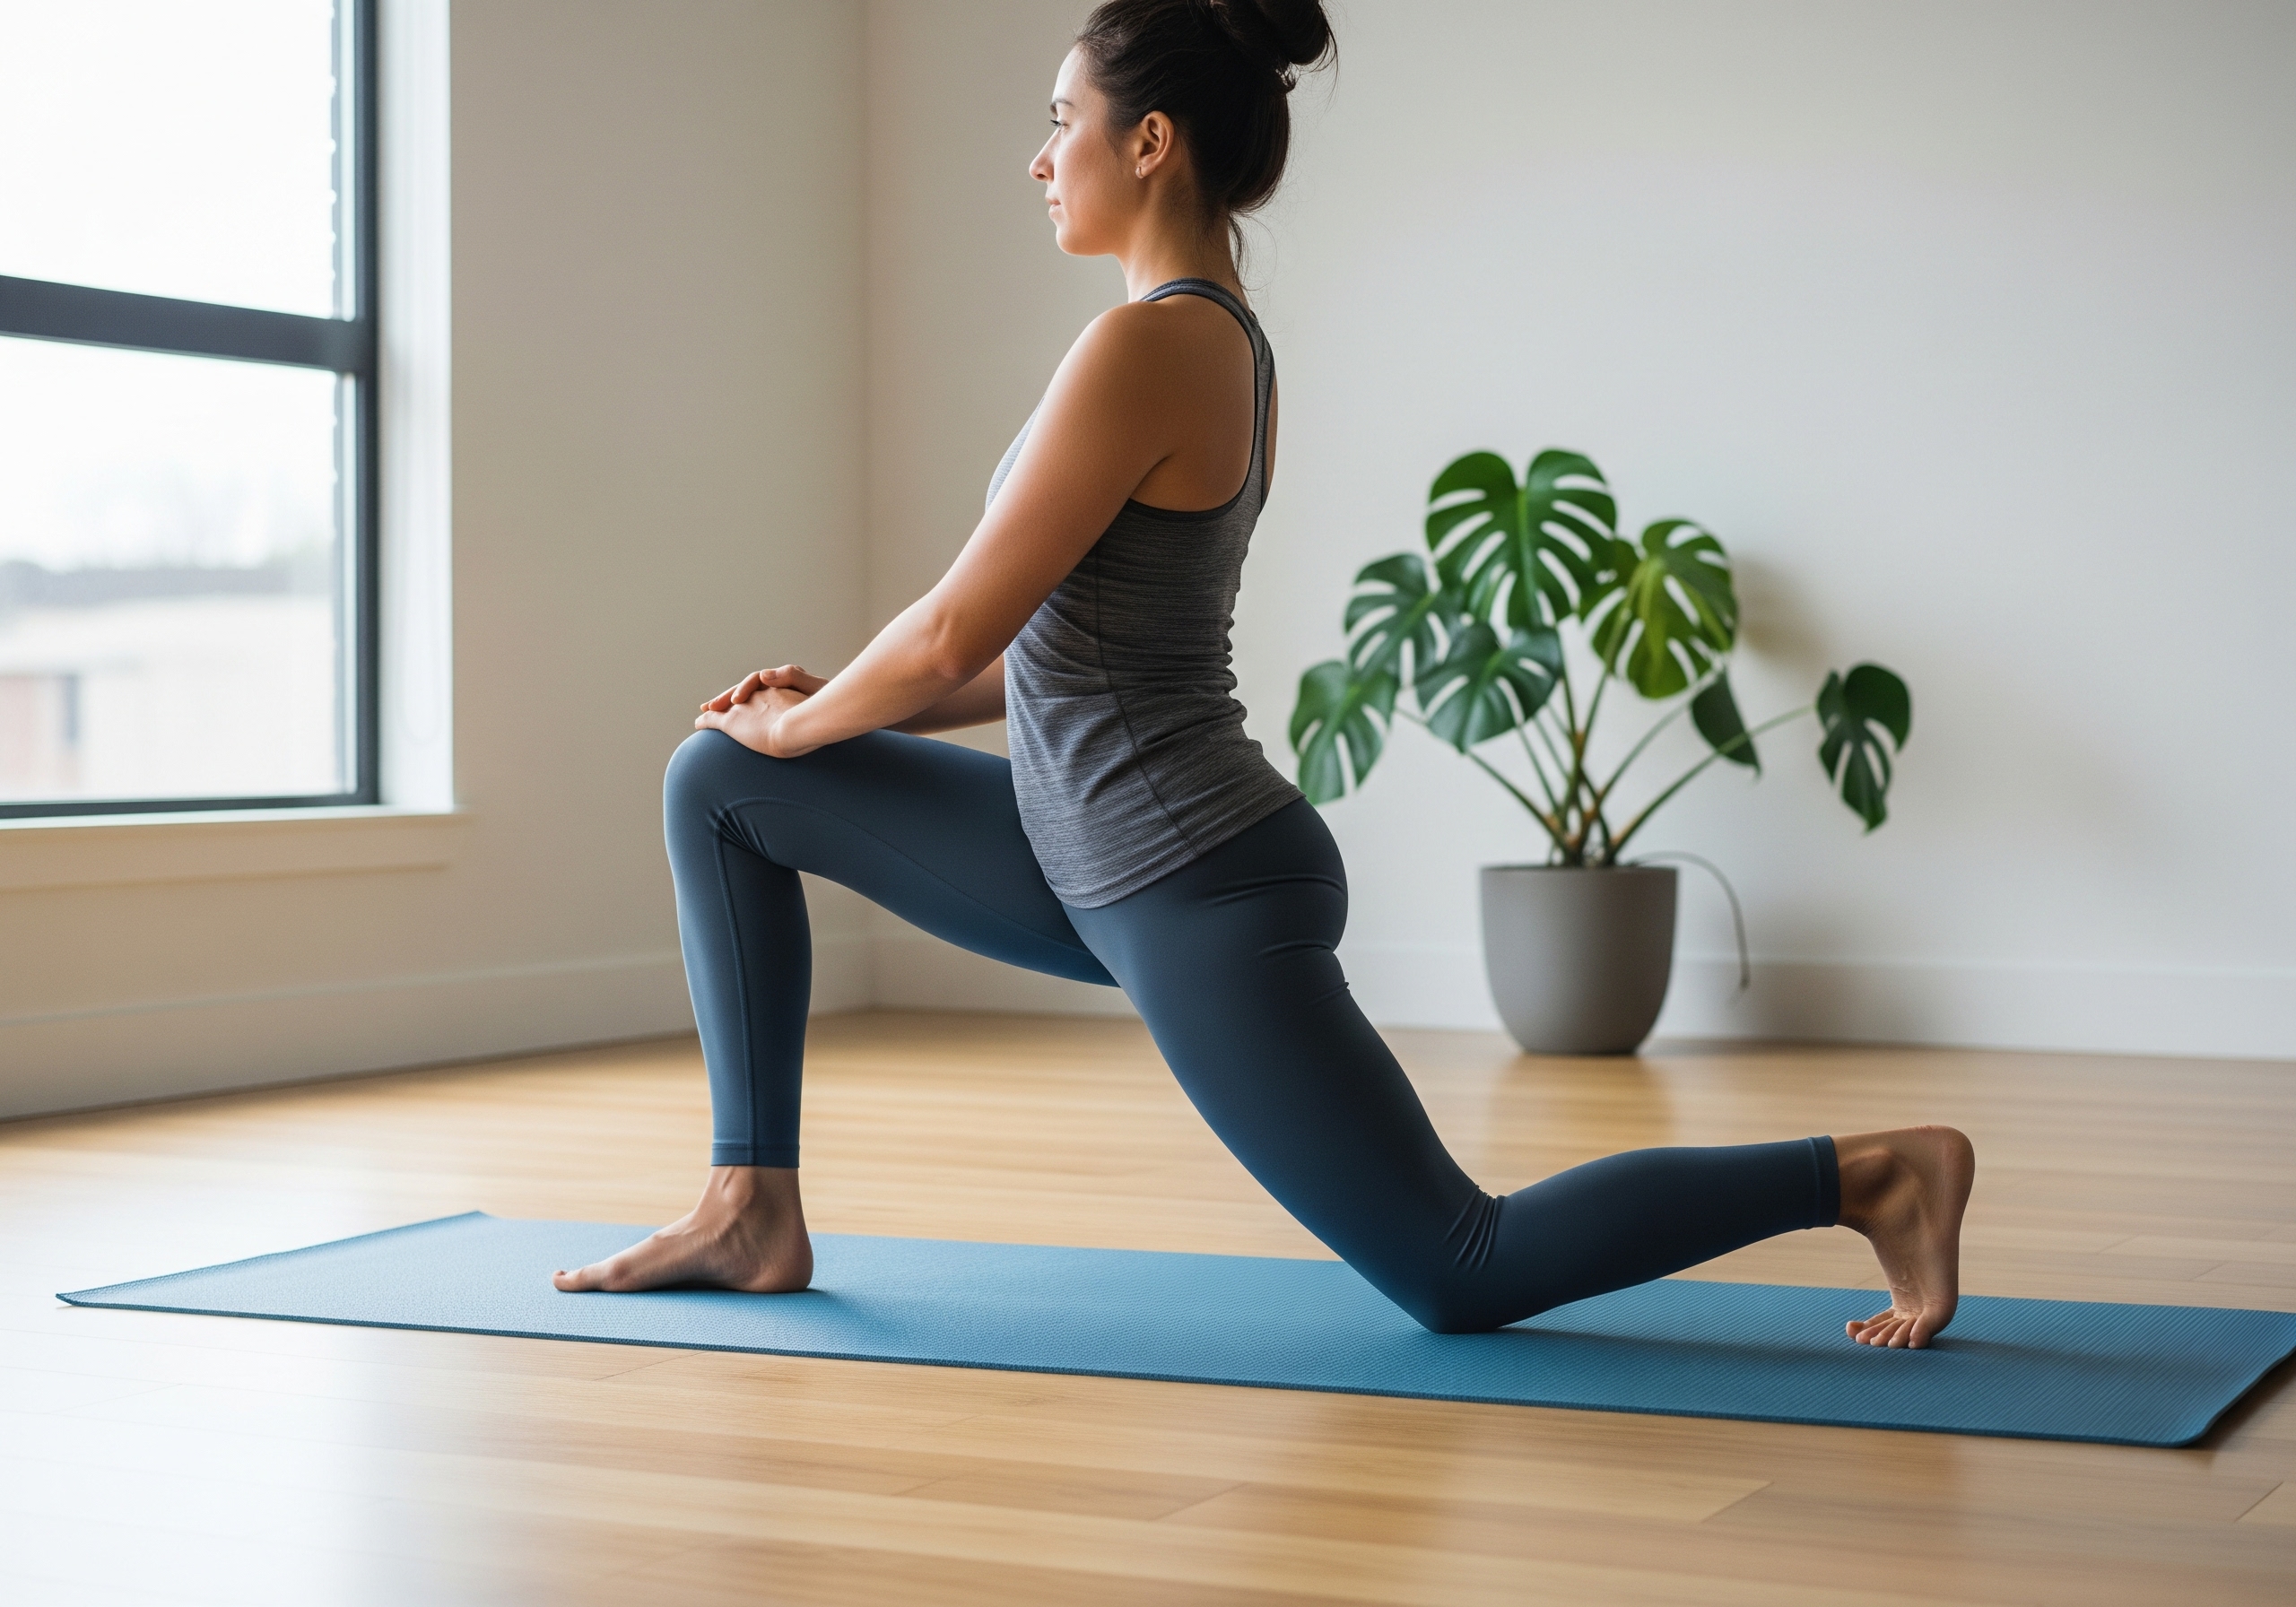
Gently slide your left knee back until you feel a comfortable stretch in the front of your left hip and thigh. Lower your hips toward the floor, keeping your right knee aligned over your ankle. You can place a folded blanket or towel under your back knee for extra cushioning and support if needed.
Step 4: Lift Your Torso
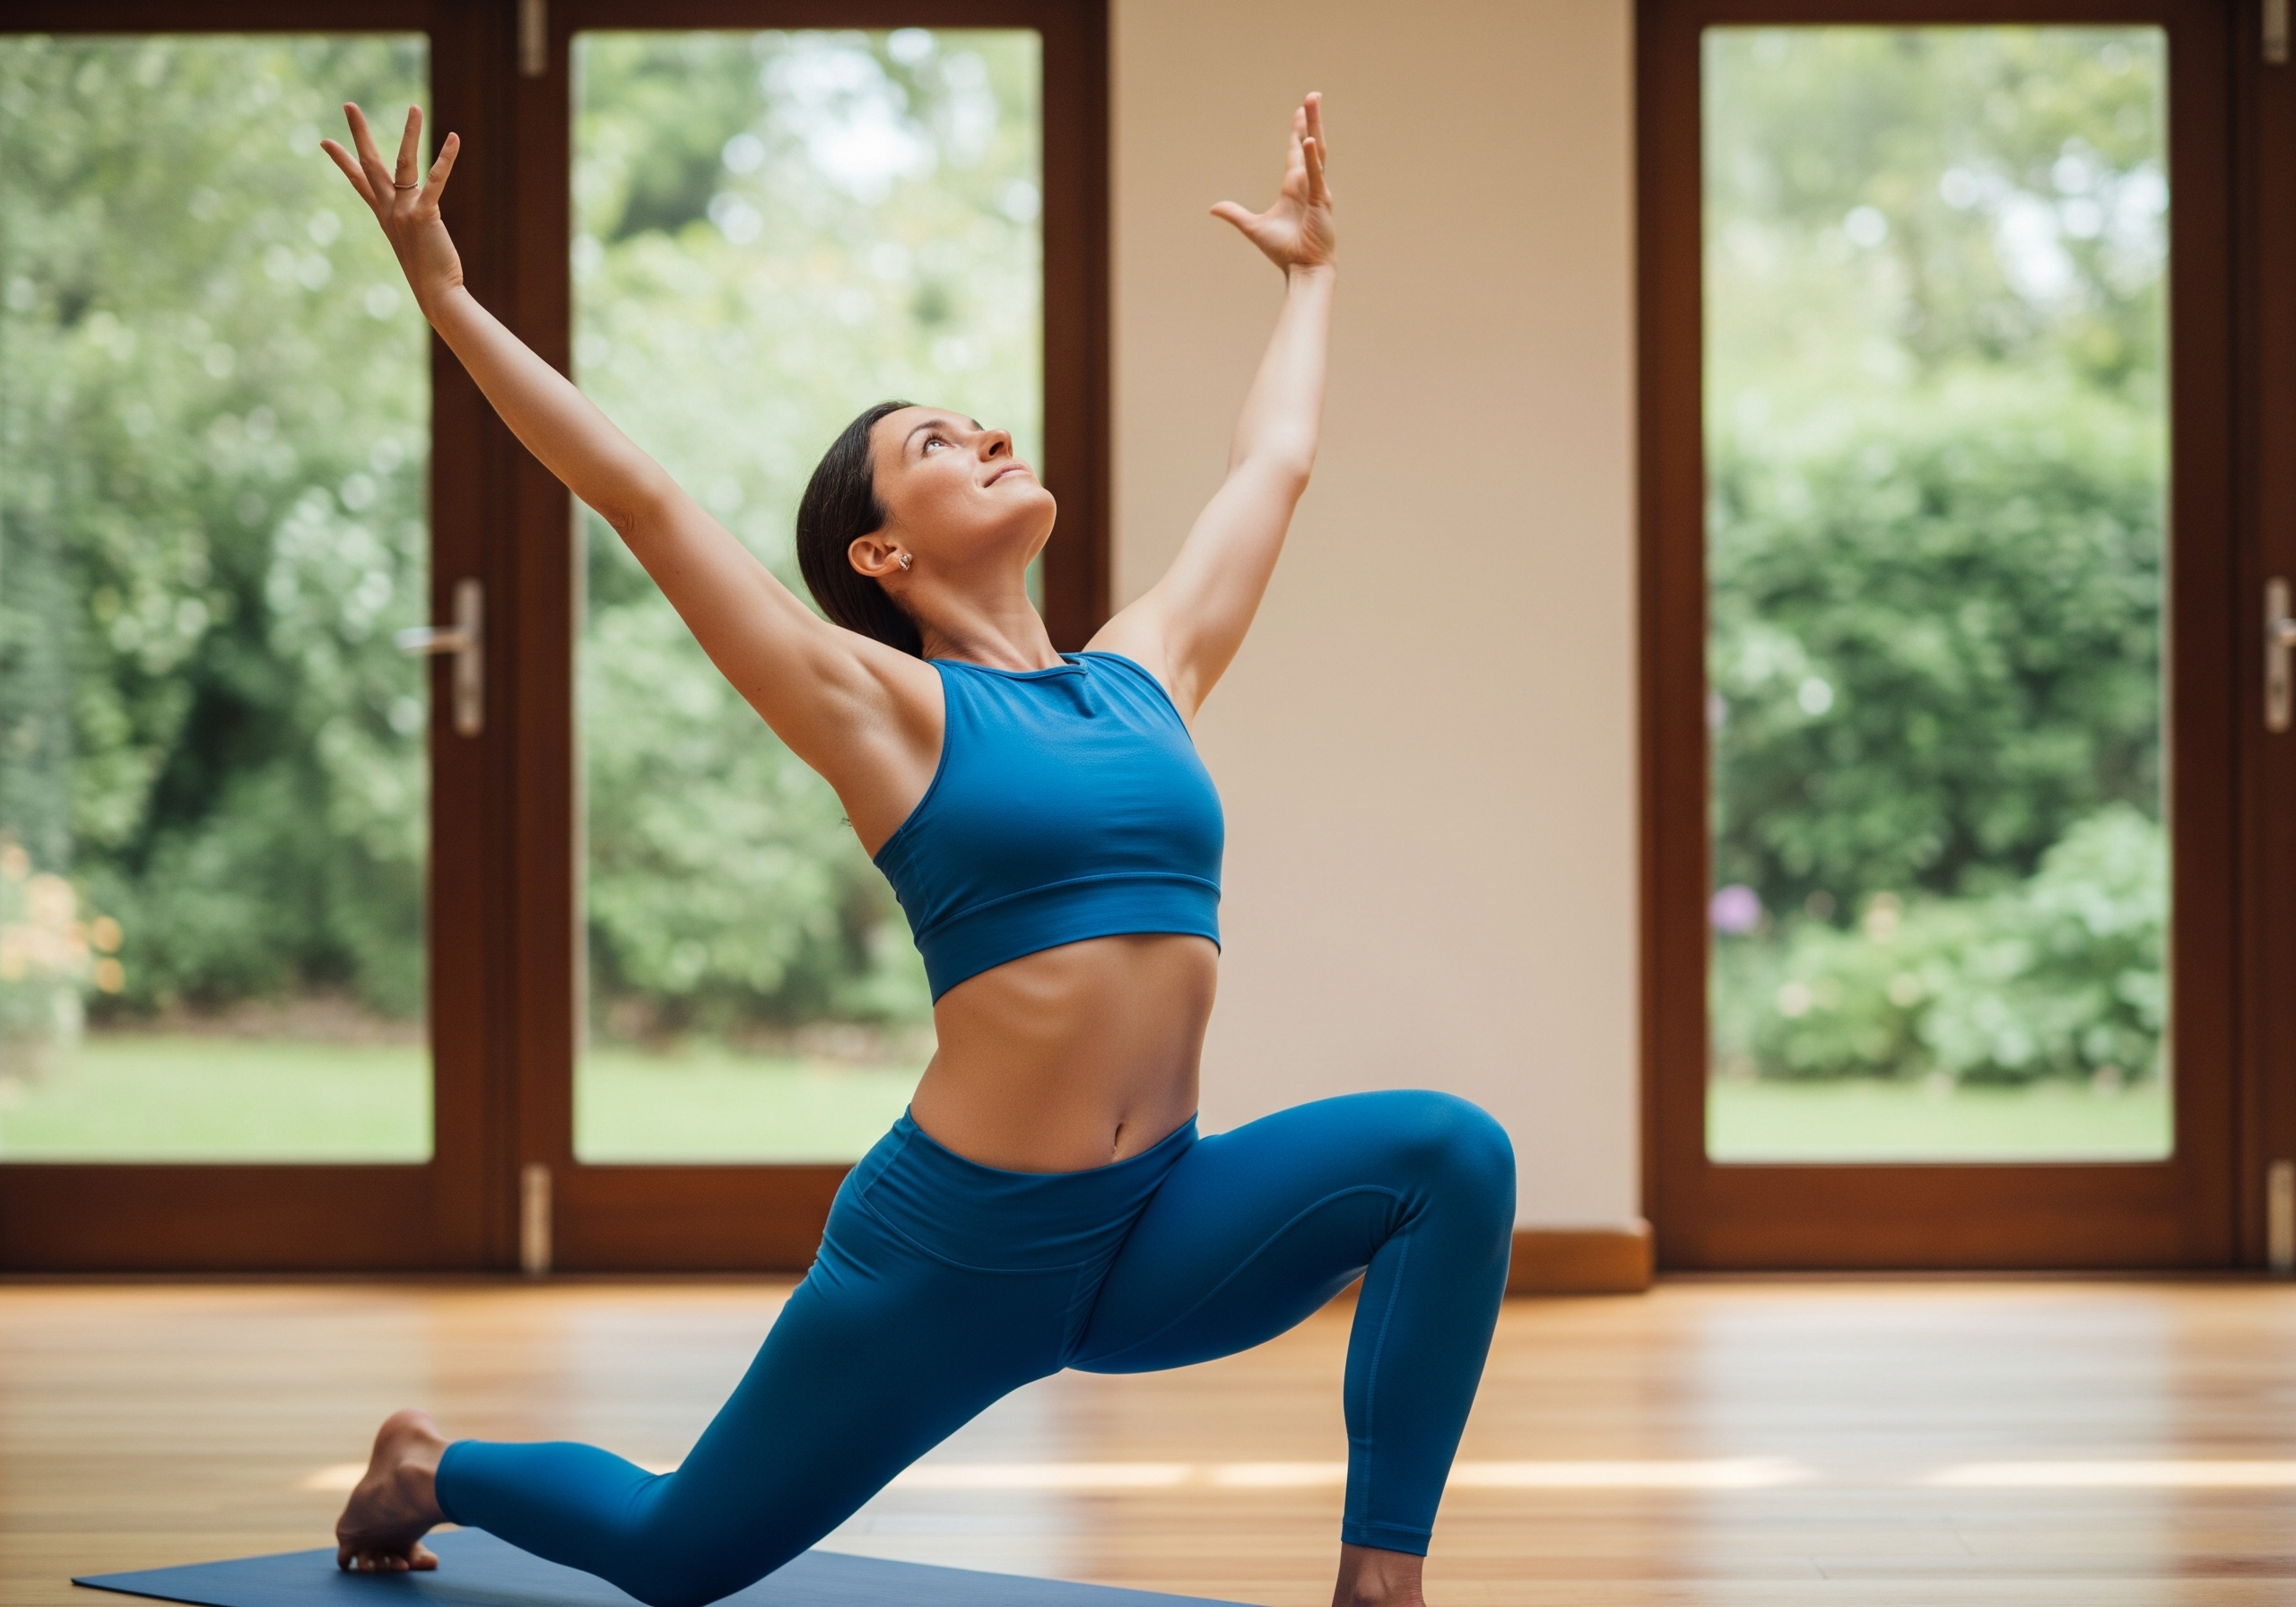
Inhale and slowly lift your torso upright. You can place your hands on your front thigh for support or, for a deeper stretch, sweep your arms up toward the ceiling. Keep your shoulders relaxed and your chest lifted.
Step 5: Hold the Pose

Hold the pose for five to eight deep, intentional breaths. With each inhalation, lengthen your spine, and with each exhalation, gently sink your hips deeper into the stretch. Engage your core to support your lower back and maintain stability.
Step 6: Release and Repeat
To come out of the pose, exhale as you bring both hands back to the floor. Step your right foot back to meet your left, returning to a tabletop position. Rest for a moment before repeating the sequence on the other side, stepping your left foot forward.
What Muscles Does the Low Lunge Work?
While the low lunge is renowned for its deep stretch, it is also a comprehensive strengthening pose that engages multiple muscle groups throughout your body. Understanding which muscles are at play can help you focus your energy and get the most out of each pose.
The Muscles You Stretch:
- Hip Flexors: This is the primary target of the low lunge. The pose effectively lengthens the iliopsoas, a major hip flexor that often becomes tight from prolonged sitting.
- Quadriceps: The front of the thigh on your back leg gets a deep, targeted stretch.
- Glutes: The pose stretches the gluteus maximus of the back leg, especially as you sink deeper into the pose.
- Psoas: This deep hip flexor, often referred to as the “muscle of the soul,” is a key player in both stretching and emotional release in the low lunge.
- Abdominals and Chest: As you lift your torso and reach your arms overhead, you create an arch in your upper back that stretches the abdominal muscles and opens the chest.
The Muscles You Strengthen:
- Quadriceps and Hamstrings: The front leg’s muscles, especially the quadriceps, are heavily engaged to stabilize your body and hold the pose. The hamstrings of the front leg also work to support the knee joint.
- Glutes: The gluteus medius and minimus of the front leg fire up to provide stability and prevent the knee from caving inward.
- Core Muscles: Your deep core muscles, including the transverse abdominis, are essential for maintaining your balance and protecting your lower back.
- Back Muscles: The erector spinae muscles along your spine activate to keep your torso upright and prevent slouching.
- Ankles and Feet: The muscles in your feet and ankles are constantly working to keep you stable in the pose, improving your overall balance and proprioception.
By simultaneously stretching and strengthening these crucial muscle groups, the low lunge provides a balanced approach to improving mobility, stability, and overall lower-body health. It’s a full-body engagement packed into a single, powerful pose.
Low Lunge Variations
The beauty of the low lunge is its versatility. You can modify the pose to suit your needs and challenge yourself as you progress. Here are a few popular variations to explore:
- Low Lunge with Hands on Blocks: If you have tight hips or hamstrings, or if balancing is a challenge, place yoga blocks on either side of your front foot and rest your hands on them. This brings the floor closer to you, allowing you to maintain an upright torso and better focus on the stretch.
- Revolved Low Lunge (Parivrtta Anjaneyasana): From the basic low lunge, place the hand on the same side as your front leg on your knee or hip. Twist your torso toward the front leg, reaching your opposite arm toward the ceiling. This variation deepens the stretch in your outer hip and spine while building core strength and improving spinal mobility.
- Low Lunge with Quad Stretch: For a more intense quadriceps stretch, bend your back knee and grab your back foot with the hand on the same side. Gently pull your heel toward your glute. This variation is excellent for runners or anyone with very tight quadriceps. Be gentle and listen to your body to avoid overstretching.
- Low Lunge with Backbend: For an even greater heart-opening stretch, from the low lunge with arms overhead, gently arch your back, lifting your gaze toward your hands. Be mindful not to crunch your lower back; instead, lift from your sternum and engage your core to support your spine.
Now that you have all the tools and knowledge you need, it’s time to get started. Incorporate the low lunge into your daily routine, and you’ll be on your way to a more mobile, flexible, and pain-free life.
Citations and References
Sedentary Lifestyle and Hip Flexor Research
- Prolonged Sitting and Hip Extension Study
- PubMed Research on Sitting and Hip Mobility
- Hip Flexor Tightness and Sitting Research
- Harvard Health on Hip Flexor Stretches
- Hospital for Special Surgery Hip Flexor Guide
- Healthline Hip Tightness Research
- Medical News Today on Hip Flexor Weakness
- Physiopedia Hip Flexors Resource
- UNC Health on Hip Flexor Tightness
Yoga and Anjaneyasana Specific Research
- Anjaneyasana Benefits Research
- Comprehensive Anjaneyasana Guide
- Mental Food Chain Yoga Analysis
- Adventure Yoga Online Tutorial
- TATA AIG Health Benefits Study
- Fitsri Yoga Parkinson’s Research
- Shvasa Yoga Athletic Benefits
- Inside Yoga Circulation Benefits
- Siddhi Yoga Comprehensive Benefits
- Rishikul Yogshala Training Guide
Exercise Science and Muscle Activation Research
- PubMed Lunge Exercise Research
- Balance and Muscle Activation Study
- ResearchGate Lunge Analysis
- Middle-Aged Women Lunge Study
- Healthline Lunge Benefits Research
- National Strength and Conditioning Association
- Healthline Muscle Activation Guide
- BarBend Lunge Research Analysis
- University of Wisconsin Muscle Activation Study
- GoodRx Lunge Benefits Analysis
Additional Medical and Anatomical References
- Healthline Hip Flexor Exercise Research
- Healthline. (2023, March 17). Hip Flexor Exercises to Strengthen and Stretch. Retrieved from https://www.healthline.com/health/fitness-exercise/hip-flexor-exercises